Special Olympics 2014 Scarf Project Update

It is time for an update. I just got my information card in the mail for the 2014 scarves.
The official colors are Red Heart Super Saver #387 Soft Navy, #319 Cherry Red, #311 White. Or Red Heart #4004 Navy, Red Heart #9925 Really Red, and # 4600 White.
Dimensions recommended: 6 feet long and 6 inches wide.
Send in a zip lock bag with your name and address on it to:
Special Olympics Indian, Attn: Scarf Project,  6100 W. 96th St., Suite 270, Indianapolis, IN 46278
For more info: www.soindiana.org/scarf project

If you are a knitter or crocheter, here is a great project you can get involved in. Here are a few scarves me and my friend Nikki made for the Indiana Special Olympics Team.  The official colors are Red Heart Super Saver yarn # 285 Royal Blue and #324 Bright Yellow. Dimensions: Length: 6 feet, width: 6 inches. Mail your finished scarf to: Special Olympics Indiana, Attn: Scarf Project, 6100 W. 96th Street, Suite 270, Indianapolis IN 46278. For more information and mailing dead line visit: www.soindiana.org
Happy Crafting for a Great Cause!

30 Sucks

We pulled off a surprise 30th Birthday party for my sweet (not legal adopted) daughter Nikki. I made a few DYI crafts I think you might like to see.
 These are pill containers that hold 7 days of pills. Well I filled them with M&M's and stamped a few 7 letter words, cut them out and popped them over the days of the weeks on the lids. I made a "get well", "cheer up", and a "30 sucks". I keep these on hand as you never know when someone needs a little cheering up or a little get well love.
 Using the same number set, I stamped a few more number 30's and glued them over an oval punch and taped that to a tooth pick and made a few cup cake sticks. Ya there are really 30 candles in that little cake! Sponge Bob was a hit for a 30 sucks party theme.
 Here is the birthday girl next to my dad. But check out the suckers... I stuck 30 suckers in to a wrapped foam brick and stamped "30 sucks" cut them out and popped dotted them to the front suckers! ha funny little funny huh!
I made her card out of the birthday decoration wrapper and stamps. She wasn't to mad at us for making fun of her getting older. All in good fun and lots of love.  Happy Birthday Nic!
Stamp a Birthday Party Happy!

Putting your Wodden Stamps Together

How to put your wooden stamps together and a great storage tip too! Watch, learn, and go ahead giggle at me. Hoping to make your day. Now get those new sets put together!
Happy Assembling so you can Stamp!

Gone Fish'in!

 Handsome went fishing and between him and his dad they brought home 15! Yes he cleans them at the kitchen sink... I am such an amazing wife! haha!
 This bugger had 1/2 of its body missing and it got away from Handsome! It flopped off the cutting board and on to the floor.. uck - fish blood everywhere!
Look at them big o'l fishies! Yumm! I see a fish fry in our near future.
Happiness is Handsome fishing!

April ATC Swap

April ATC Swaps are by: (brown bunnies) Georgeanne Caine, (daffodils) Janice Rowe, (pink bunny) Pam Wright, and (blue ribbon) Rose Wainman. The eggs are by me. Thanks ladies for sharing your great works of art. I cannot wait to glue them on a card front for next years Easter cards.

Join us in swapping for May. Make four (4) 2 1/2" x 3 1/2" little works of art. Theme for May is flowers. Send (or give) your ATC's to me no later then the last day of each month. I will swap them out and get them back to you. If you are mailing be sure to add a SASE with enough postage to send you your swaps back. I am also going to post the rest of the 2013 ATC Theme for the swaps so you can plan and work ahead if you wish.

May: Flowers
June: Men!
July: Let Freedom Ring!
Aug: Summer Fun!
Sept: Scripture
Oct: Boo To You!
Nov: Fall
Dec: Christmas Glitter

I have been invited to an ATC swap with a yahoo group and I thought I would share what I made. The theme is vintage, and I hope this fits the bill. I love the way it turned out. I used all card stock, ink, pearls and ink from Stampin Up .... ov' course!
Happy Stamping ATC Swaps!

How to Ink your Stamps

Well here is another video to give you something more to giggle at! I thought starting out with focusing on the basics would give everyone a refresher lesson and help the new stampers too. Stay tuned as there are is more to come! You've been warned!
Happy Stamping!

Easter Card Swaps


Happy Easter cards by my amazing club ladies; Susan Crabb (top card) and Gloria Ross (bottom card) I love swapping cards, it gives me such great ideas. Hope you enjoy seeing them. Comments are always welcome. Just click on the comment button below and add some love'n to any post. It makes the card makers smile!
Happy Card Swapping!

More Card Swaps

 These two cute cards are by two very talented stampers. Mickey is by Tracy Swift. The flip flops are from Bev Mesengle. Bev used real sand paper for the sand.
Happy Stamping Cute Cards!

Wheeled Paper Basket

8 1/2" x 11" card stock wheeled or stamped.
Score at the 8 1/2" end at 3 1/4" and at 5 1/4".
Turn your card stock in your trimmer and Score at the 11" end at 1", 2", 3", 4", 7", 8", 9" and 10".
Fold on all the score line.
Cut each score mark on the 11" end to the center score marking on each side.
Follow the rest of the instructions according to the video.
Happy Wheeled Basket Making!

Swap Shares

Lovey cards from two very lovely ladies. Thanks Judy Hacker (top card) and Becky Kirkman (bottom card) for these beautiful card swaps.
Happy Swapping!

How to Use, clean and ink, Stampin Up Wheels


Welcome to my first video post. I give you full permission to laugh at this! Warning there will be more to come....

The videos I share will never be for sale, I think that takes the joy out of teaching what I love. I promise not to be consistent, perfect or always in a beautiful format! I promise to studder, drag a few phrases and say...ummmm a lot! There may even be a few bloopers along the way! But above all I hope you enjoy, share with your stamping crafting friends and give credit where credit is due!

I am always open to questions, suggestions and will get back with you as soon as I can, so leave comments.
Happy Viewing!

Blue Ribbon Recipe Scrappage

Look familiar? This recipe scrap page is a spin off from the 12x12 scrap page I share a few days ago, and also part of the inspiration from the window card. I have used and shared this great idea on lots of great projects. Thanks to Barb Brinkman and Debbie Green for the yummy recipes that made this page share so great. The super simple and cute little trick to the background of these pages are the dots. Yep the little dots. I used my dauber in ink and dotted it on the card stock to make a simple quick background. Don't 'ca just love it?
Happy Cooking and Scraping!

This and That and Trip!


Your life is: Awesome. Quirky. Exciting. Perfectly messy. And happening really fast. So we're happy to introduce our newest product line that lets you capture it all on-the-go. This and That will debut in the 2013-2014 annual catalog, but we're giving you and everybody else the chance to get it now.
While you're at it, enter to win a free trip.  And tell everybody to do the same.

Item
Description
Price
131268
Epic Day This and That Journal
$10.95
130814
Epic Day This and That Designer Series Paper
$10.95
130133
Remember This and That Rotary Stamp
$5.95
131271
Epic Day This and That Designer Stickers
$4.95
131269
Epic Day This and That Designer Washi Tape
$4.95
133350
Epic Day This and That Bundle
Includes the five This and That products listed above. Only available in a bundle until April 30.
$32.08
15% Off Retail Value!
Read On . . .
  • We're introducing the line with these five products, but we'll be adding more This and That stuff as time goes on.
  • Bundle Dates: Ending April 30 (remember the items that come in the bundle will be available in May and in the new catalog, but we're only offering the discounted bundled until April 30).
  • You can place orders on any order type (customer, demonstrator, workshop, or online).
  • You can get as many This and That products or bundles as you want.
  • You can buy the This and That products separately. But why would you do that when you can get all five together and save 15 percent? 
  • Did your spidey eyes see that two of our In Colors (Calypso Coral and Pool Party) are included in the products? Your eyes were right. You'll just have to check out the catalog transition information in April to see what that's all about. 
  • Click here to see the pdf. flyer for more details on product 
  • Like it on Facebook and get entered to win a free trip to San Diego California!

Banana Coconut Cake

 I thought it might be time to share another really yummy recipe. This came from the Penzey's Spice magazine. They have the absolute best spices and the catalogs come in the mail filled with great recipes for free! You can sign up at www.penzeys.com to get on there mailing list and get one delivered to your mailbox!
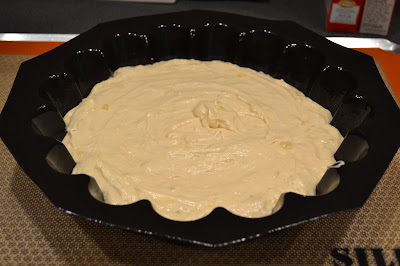
 Here is the cake batter in my Demarle baking mold. Ready to pop in the oven.
 Here is the beautiful cake in the cake dish in one piece and perfect!

 Oh my was this ever good. Great banana flavor and the crispy coconut topping was an added yum. The cake became more moist on the plate even a few days after baking. The yummy topping kinda melted into the cake.
Banana Cake with Coconut Topping.
1 1/2 c sugar
1/2 c butter softened
2 eggs
2 1/4 c flour
3/4 tsp. baking soda
1/2 tsp. baking powder
1/2 tsp. salt
1/4 c buttermilk, sour cream or plain yogurt. (I used buttermilk, because I had it)
1 tsp. vanilla
1 c very ripe, squished banana (2-3 bananas)
Topping
1/2 c butter milted
3/4 c brown sugar
1 c chopped walnuts or pecans
1 1/2 c sweetened coconut flakes
5 T milk
Preheat oven to 375 degrees. Grease and flour a 9x13" pan and set aside. In a large mixing bowl, cream together sugar and butter until light and fluffy. Add the eggs and beat well. In a separate bowl, sift together the flour, baking soda, baking soda, baking powder and salt. Graduallyu beat into the creamed mixture alternating with the buttermilk. Stir in the vanilla and banana and mix until just combined. Pour into the pan and bake for 35-40 minutes, until browned and springy to the touch. Let the cake cook before frosting.
For the topping; Turn your oven to low broil. Beat together the melted butter and brown sugar. Stir in the nuts, coconut and enought milk to get a nice spreading consistency. Spread over the cake. Place under the broiler until bubbly, 5-10 minutes depending on your oven.

Directions for using your Demarle molds: Oven at 365 degrees. Do not grease mold. Once cake is baked, cool and turn out on plate. Spread topping on cake, then put back in the oven to broil the top. 
Happy Baking!

Butterfly Window


 This beautiful card was made by Crista Miller and I was blessed to received it as a swap. I had to share this great idea and show you what I came up with from the inspiration. I love this card Crista, thanks so much for coming up with it for our swap.

 This is a great idea to use up strips of scrap background papers. Cut the white card stock to 3 3/4" x 10", fold 1/2, run the front through a embossing folder of your choice. You can find some great ones here.  Glue that to the center of a 5 1/2" x 4 1/4" colored card stock. Punch the butterfly in the front of the card. Cut the designer series background paper large enough to fit behind the butterfly and to show through. Mine is about 2 1/2" x 3 3/4". Glue to lower edge of inside of card. Use the punched out butterfly to glue to inside and stamp a little greeting on it. I used a rhinestone in the center for the butterfly to give it some razzle dazzle bling!
You can use any shape punch for the "window". Have loads of fun creating a few of these fun cards for your own stash. Click on any of the highlighted underlined words to get to the order page to get these great products for yourself.
Happy Window Punching!

10 days Before and After

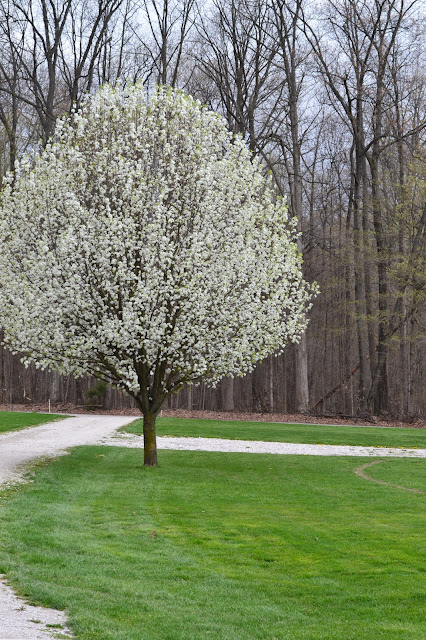
 This was just 10 days ago and now look at the shot below of the same tree and drive way! Amazing huh! The tree may still be white, but now it is white with blooms. God makes all things new.
Happy Spring!

Blue Ribbon


Bright Colors and happy paper makes for this super cute scrapbook page. This happy page was shared at last months Scrapbook Club.  Stamp set Blue Ribbon #125979 w $28.95 #125981 c $20.95 I love love love Summer Smooches designer series paper. #125409 $10.95

Blue Ribbon Wood-Mount Stamp Set
Summer Smooches Designer Series Paper
May You be inspired by this fun page.
Happy Scrapbooking!

For The Birds


Giving a challenge to stamp for fun. This was what I started with. I love the For the Birds Stamp set #126405 w $32.95 #126407 c $24.95 and the Details Lace Tape #130966 $9.95 You can click on any of the underlined highlighted links to take you to the order page to get these and more great Stampin Up products.


Delicate Details Lace TapeUsing Chocolate Chip Ink I stamped the cute birds on white cards stock and colored them in using the stampin markers. The great details lace tape was placed across the card and envelope then I sponged using Bashful Blue ink on a sponge. Because the tape is repositional, after sponging I was able to lift off the tape leaving this beautiful sponged design behind. I used a bit of ribbon from my stash jar. 
For the Birds Wood-Mount Stamp Set
Happy Stamping For Fun!

New Photopolymer Stamp Set


We've searched long and hard for just the right material to be able to introduce completely clear stamping. And we've found it. We're excited to announce that we now have wood-mount, clear-mount AND photopolymer stamps! The new photopolymer will be an addition to our stamp line and will appeal to all types of stampers. Our top-quality photopolymer has just enough give to create a perfectly stamped image every time and with the introduction of our firm-foam pads, let's just say they're meant for each other! Photopolymer stamps will also be unique, fun designs that will inspire you and provide more versatile options you may not see in our traditional wood- and clear-mount stamp options. 
What makes them so great?
  • They're entirely transparent for perfect placement every time! 
  • They are durable. The photopolymer material is designed to last. 
  • Can you say sticky? (Don't worry; in a good way.) These stamps stick amazingly well to our clear blocks.
  • They're age tested. They won't yellow or cloud up over time. 
  • We could go on, but we'll let you try them for yourself. 
  • See the flyer here
  • Bombs Away Birthday Photopolymer Stamp Set
    $13.95 #133411
    Includes 7 pieces. Recommend clear blocks C and H. Purchase separately.
image description

March Snow

 I would like to say... I hate snow. But I really don't, unless I have to get out in it. And I won't!  I do love being snowed in. It is a great excuse to not work, to stay in bed a little longer, read a few more chapters, eat warm soup, work on a cozy quilt and stamp a few cards, oh and sit by the fire place and drink hot tea or cocoa.
 It looks like we were having a blizzard, but it was just snowing really hard, really fast, and really big flakes.... really! I know this is nothing to some, but wow to others.

I just think it is so beautiful. It has this peaceful hush about it. It is like a protected covering of clean, white newness. A stillness, a deepening connection to the Father. A place of rest. It is so still, and quite I can hear His breath, feel His touch, see His light, know His ever loving presence within me.

Stop and listen sometime.... do you?
 This seams like the longest winter we have had in Indiana in many years, but what I am told it is about normal. What ever normal is.... Makes no difference to me, it is still beautiful to look at and marvel in the wonders of God.
 Look at this beautiful blessing God delivered to my back yard the morning after. What a beautiful way to wake up and watch while sipping coffee. Enjoying the good little things of life in abundance, makes the big bad things not so big.
This is our driveway looking across the road. A picture perfect sight to behold. All things clean and white. God's words in plain view, real life, alive and beautiful.
Praise Him for His Promises!

Blast from the Past part 3

I love this Cajun Craze Card with the cross stamp. The little leaves sizzlet, card stock, ink and embossing folder are available. This makes such a nice sympothy card. Hope you don't need one, but do hope this inspires you to stamp some today.
Happy Stamping

Post-It Note Cuties

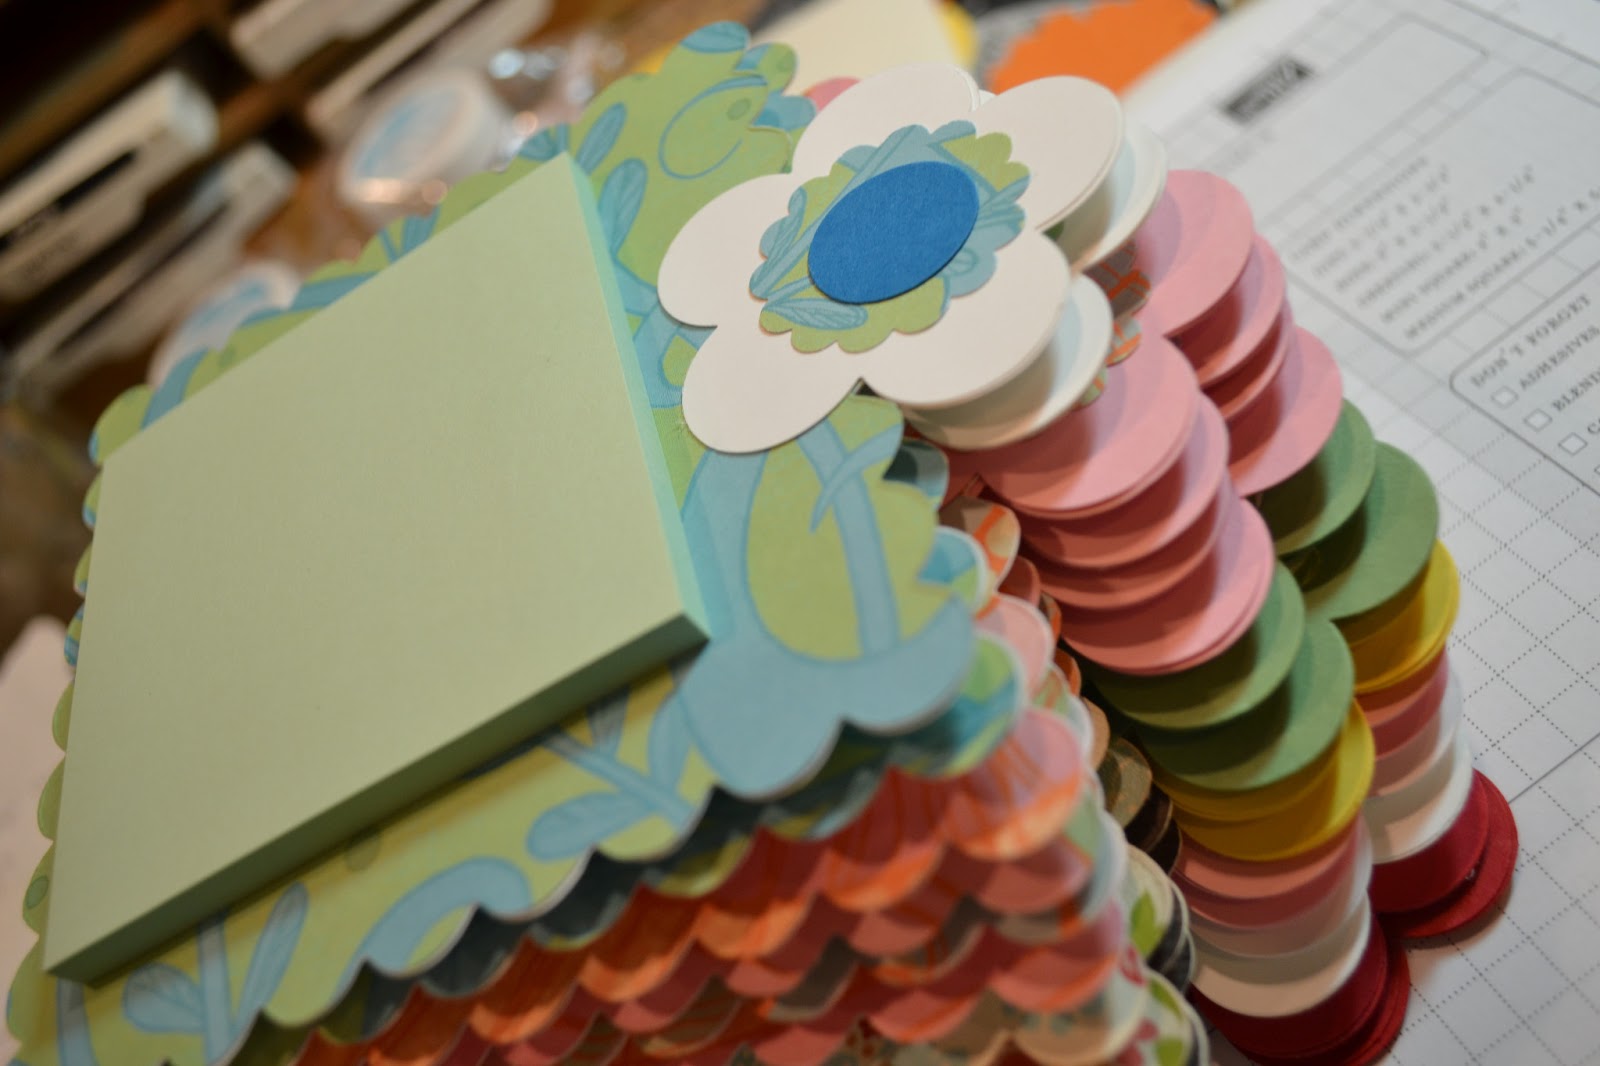
Want to make a few of these cuties? Everyone needs a handy post-it note, right? How about making them uber-cuteness! This quick and easy gift idea is from my dear friend and Stampin Up up-line, Mary Ammar. They took me about an hour or so, to make 18! Package them in a cello bag with a matching pen and you have a great inexpensive gift idea.
 Cut out one card stack and one designer background paper using the square scallop die.
 Glue the designer background paper over the card stock. The post-it note will stick to the center of the scalloped square.
 Punch out two posies and glue them together sandwiching them one on the front and one on the back of the scallop square.
This is the back view. You can add a magnet at this point if you want it for the fridge.
Add a few more circle punches to the posie front to finish the flower.
Pretty huh! I love stacks of pretty fabric and this reminds me of a stack of pretty fabric.
Happy Gift Making!