Circled Butterfly

This is crazy simple, and would be a perfect Whip it  Up Wednesday video. But I think that you are all uber smart and can look and see to figure this one out for yourself!

Just punch the little butterfly in a white card stock scrap, then using the circle punch upside down, so you can see what you are punching. Center the butterfly inside the circle and punch it out. Pop dot the butterfly circle over a larger designer series paper circle, and glue to the front of the card. Easy peasy.

This card is made out of Rich Razzleberry card stock - it is such a great color.

A Tree or a Vine

Okay I think I may be able to explain this in a way that you can get a FREE Art Journal lesson here today. If you are a beginner to art journaling this is a great place to start. This is super easy and you can do this, I promise. Just gather a few tools, and start by making a mark on the paper.

You will need watercolor pencils, black permanent marker, pencil, and eraser, aqua painters or paint brush and a little jar of water. Oh and your art journal book, or just some watercolor paper.

Start with using your pencil to draw a tree or vine something similar to what I have here. You can copy if you want, you just can't publish and sale it - okay.

Once you have the tree/vine, be sure to add the "curls" to the branches. Then add a few flowers. I started with the flower middle using a circle, then added the petals. Once you have those penciled in, it is time to color. See that wasn't to hard, now was it?

I colored in my flower centers and then the pedals. How did I color them in, well I used the pencil right on the paper, and then went over it with the aqua brush or use a wet paint brush. Don't make it to set unless you want a really drippy bleedy look. Oh and use your favorite colors.

Then to color in the background I used my aqua painter, or you can use your wet paint brush and pick up the color off of the pencil. Yep you read it right! Do not color on the page like you did for the flowers, use the ink off the pencil by putting the aqua painter or wet brush right on the sharp end of the pencil and then start closest to the center of the vine or tree trunk and color your darkest shade out to the lightest shade moving away from the center of the branch. You will need to add color closes to the branch or center as you go. Be careful to pick colors that will blend together nicely and not turn to mud. You can try mixing colors on a scrap paper before putting on your art work. This way you will know what color works with what color. Once all the back ground is colored in as you like it. Let the wetness dry before moving on to the markers.

Go over your pencil lines using a black marker. You can use different sizes of markers (if you have them) to make the job a little easier. I used a fine tip for the flowers and then a wider tip for the tree branches and curls. You will cover up some of the color using a wider line marker, but the contrast of the thick and thin is nice.

If you have any questions, just leave a comment and I will get back to you. I would love to see you work too, so share in the comments if you take on this little art project.

Layer the Butterfly

Yellow and gray are so great together. At card club this month we did cards with windows and layers. I love using my punches. Next to the big shot I think that the punches are my next favorite stampin toy.
To make this card you will need to:
Fold 1/2 sheet of gray c/s in 1/2 for card base. Glue on a strip of yellow c/s down the center of card front and then glue on a strip of coordinating designer series paper to each side of the yellow.. Punch the butterfly in a strip of white c/s just sightly larger then the yellow c/s. Stamp on a greeting of choice in a coordinating ink color. POP DOT the white c/s strip over the yellow. Punch out a small butterfly and pop dot this inside the large butterfly.
Cuteness!

Hot Chicks

This chick is so stink'in cute. Love her eyelashes. 
 Just like I love these two friends from elementary school and their "eyelashes"!
 Oh the glamor of it all! No I didn't try any on.
I had recently had lasik eye surgery and was a frady cat!

Bee Happy

Bright, fun and adorable is what this card is. And a bright, fun, adorable lady, Judi Birt, gave it to me for my Birthday. Thanks Judi for thinking of me on my special day.
 Debbie Bond-Luers sent me this lovely card. I think I may have shared it a few months back as it was a swap card. I do love it, especially the layers of yellow and white card stock tucked into the adorable corners. Thanks Deb for sending me sweet birthday wishes.

Back to School

I entered an ATC swap with the theme "Back to School". I didn't think it would be to hard, till I sat down to complete it. It was really hard! Guess I was having a bit of brain blockage when it came to creating one.

This isn't the ATC that was sent to my swap partner. She got a funny one, with mom celebrating that the kids were back in school. Sorry I didn't get a picture of it.

But in the mean time, I doodled this one and am really happy with the way it turned out. Plus in my heart, I really wouldn't mind going to art school for real.

When you are young and heading to collage and don't know what you want to do with the rest of your life. I promise when you get to the other side of life you will figure it out! I know encouraging thought - right!

Happy

 I would have a birthday everyday if it meant receiving a card like this. This is such a beautiful card with gorgeous use of papers. I love how my sweet friend Pam used papers she had with a few retired Stampin Up Stamps and pearls and flowers. The ink rubbed on the embossed little white card stock makes for a beautiful added layer of texture.
The inside is just as beautiful as the outside. Pam is one who loves to design cards that reminds her of the person she is sending it to, she picks out things that they like. She put a lot of thought, time and effort in her card making to get them just right for the person she is sending it to. Thank you so much for taking the time to make this perfectly beautiful handmade card just for me. I love it. It is worthy of framing and hanging on the wall.

Brought to Life

Watercolor pencils, aqua painter and micro black markers. Inspiration from pinterest. I love this layout, but you know I love hearts flowers and birds and bright colors.

Happy Birthday

I celebrated my 30ish plus birthday a few weeks past. Ya really you think I am going to reveal my age! Ha! I will however share a few of the most beautiful hand made cards with heartfelt messages written inside. I am usually the one sending cards, and once in a while I receive one myself. It is so awesome to get a handmade card, it truly makes ones day. Thank you Barb Brinkman for this adorable card.

This card is so great because it goes with using up those bits of scraps. Barb punched out squares from designer paper and glued them on the card front. She then stamped and punched out a few more stamped squares and circle embellishments and added a bow.

Beautiful Visitor

 We had a beautiful visitor to my flower garden the other day, and I wanted to share this wonderful story with you. When my mom passed a few years ago, my dear friend Beverly Bruce sent me a card with the most touching message in it. She knew my mom and how she loved butterflies. Bev's note read, " when you see a butterfly, think of it as a visit from your mom".
So now every time I see a butterfly large or small it brings wonderful memories of my mom. It is like a beautiful visit from her. I had one land on my shoulder the same day this one came to visit. Guess mom knows when I need a visit from her.

Whip it Up Wednesday Cards


 Here are a couple of samples I made after filming my last Whip it Up Wednesday video. This is a great way to use up scraps of designer series paper. Hope you are inspired to get out those scraps and create cards.

Give Thanks

It isn't Thanksgiving yet, but there is no better time then giving thanks to the Lord all the time.  

I am thankful for you too. For your commitment to read my silly postings, to even take the time to comment on a few. I am thankful for my customers who keep me going with this awesome Stamp'in Up! business. I am thankful for your talent and what you teach me. I am most thankful for the friendships that have grown out of this business. It is the most important facet and makes the work worth while.

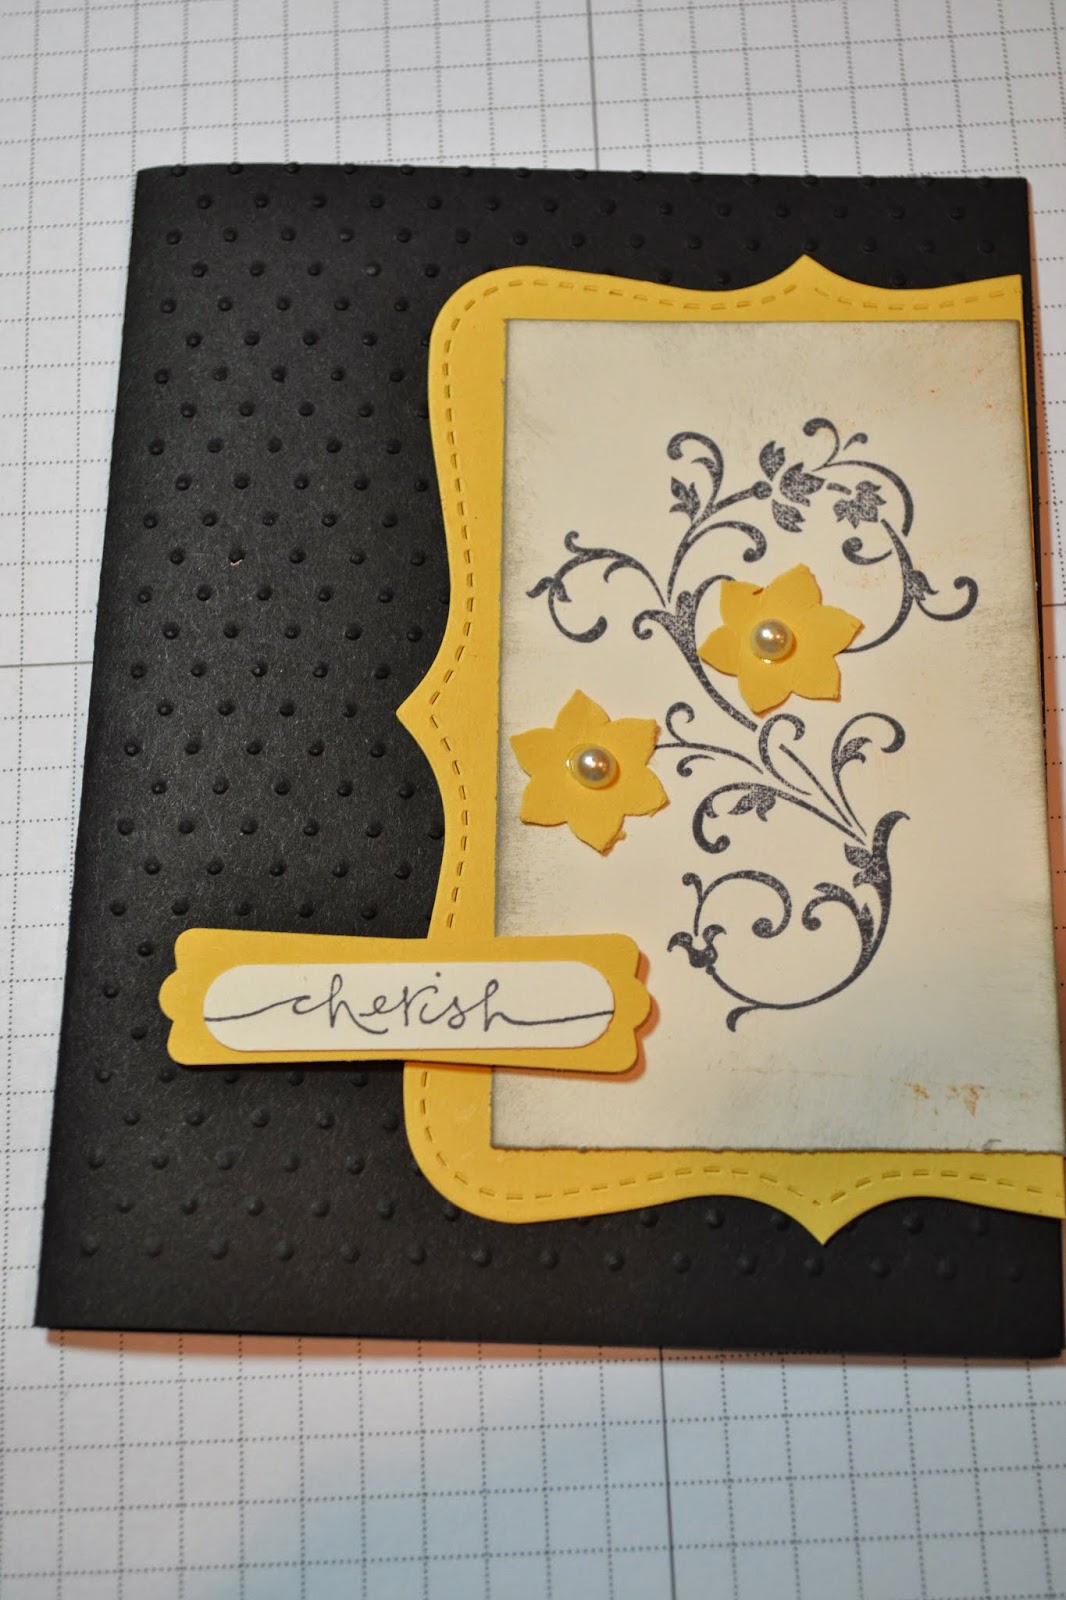
Cherish

This beautiful card is by the oh so lovable, Crista Miller. She is so creative and comes up with really great cards, scrapbook layouts, and she did some really cute stamped art for her kitchen.

 Here is a close up of the tag layers and pearls on the flowers.
And she even finished the inside of the card - nice Crista - really nice finish.
Thanks for sharing your talent.

Doodling Do

Just a little doodle today. I got this far with it and didn't know what more to do with it, so said to myself, "self, it is done!"

I know sometimes we can sit and look at a blank page forever not knowing where to start or what to do.... I get the page started, colored and then get stopped. Ug! Guess that is the sign to stop.

Ribbon of Hope

 The sweet Sarah Smith made this great card to swap and share. I really like the use of the ribbon. You could do this ribbon design in any color for anyone who may be battling cancer. Thanks Sarah.

Whip it Up Wednesday Video

Quick and easy greeting card to make using your scrap designer papers. Please note if you are view this as an email feed you will need to click over to the blog to view the video.

 You will need:

* One piece of card stock cut to 81/2" x 4 1/4" for the base of the card. Fold this in half and it will make a medium size card. This size card will fit into our medium size envelops.

* Multiple lengths of scrap designer series paper that coordinate, cut to 1/2 " - 1" wide strips. You can go crazy here. My card is show with all the same size strips, but you can mix it up and they can be any width.

Glue the strips side by side across the front of your card at any angle you choose as long as it reaches all the way across the card front. Snip any hangover you may have of the longer strips.

Add a greeting and wa-la Whip it Up Wednesday quick and easy card.

Enjoy and have fun making lots of cards using this design. Use up those scraps to make something beautiful.

Order your supplies here.
Clear Translucent Medium Envelopes
Price: $4.95
Crumb Cake Medium Envelopes
Price: $6.50
Crumb Cake Note Cards & Envelopes by Stampin' Up!
Crumb Cake Note Cards & Envelopes
Price: $5.95
Gift Card Enclosure Pack by Stampin' Up!
Gift Card Enclosure Pack
Price: $5.95
Very Vanilla Medium Envelopes
Price: $6.50
Whisper White Medium Envelopes
Price: $6.50
Whisper White Mini Square Envelopes
Price: $7.50
Whisper White Note Cards & Envelopes
Price: $5.95

New Stamp Set Available

Yee-haw Photopolymer Stamp Set

We've searched long and hard for just the right material to be able to introduce completely clear stamping. And we've found it. We're excited to announce that we now have wood-mount, clear-mount AND photopolymer stamps! The new photopolymer will be an addition to our stamp line and will appeal to all types of stampers. Our top-quality photopolymer has just enough give to create a perfectly stamped image every time and with the introduction of our firm-foam pads, let's just say they're meant for each other! Photopolymer stamps will also be unique, fun designs that will inspire you and provide more versatile options you may not see in our traditional wood- and clear-mount stamp options. 
What makes them so great?
  • They're entirely transparent for perfect placement every time! 
  • They are durable. The photopolymer material is designed to last. 
  • Can you say sticky? (Don't worry; in a good way.) These stamps stick amazingly well to our clear blocks.
  • They're age tested. They won't yellow or cloud up over time. 
  • We could go on, but we'll let you try them for yourself.
They are clearly a great choice.


Click here to see full size flyer.


Take Heart

No matter where you go, no matter what you are going through. Take heart it is I..... The Lord is with you, walking beside you, pushing your forward, and sometimes he is carrying you. You are never alone. Take heart my beloved child it is I.

Deepest Sympathy

 Have you caught on that the cards theme for the month of July was Sympathy cards. I have learned that as I get older I send more sympathy cards. I really don't like that part of aging. But sending an hand made card to a love one in their time of loss is really a special thing to do.

This beautiful card is by Carolyn Houck. She always seconds guess herself if the cards are good enough! Silly friend the cards are really really good enough! I just wish she would quit out doing her teacher!

Beautiful Day

Inspiration came from Elvie Studio. I love her art work. It just makes me smile.
May your day be filled with kindness!

Today is my 24th wedding anniversary to the best husband in the world. 

Thinking of You

 Bev Masengale has a great idea and such an easy card to create. I like it easy don't you. She glued on the wonderful doilies by Stamp'in Up! and stamped the greeting in white craft ink. Super cute quick card. Thanks Bev for sharing and swapping.

Peace

Give yourself a break from the woes of life and find some peace in your day.

Sending Love


 I love everything about this card, the colors the layout the used of the lace ribbon. Becky Kirkham did an outstanding job on this card. It would brighten anyone's day when dealing with a loss of a loved one. Thanks Becky for sharing.

Wild Thang

It is a bit wild for even me. But I do love the flowers. I was inspired by some stamps I saw from another company and refused to buy them because I thought to my self, these are easy shapes, just draw them - ha so I did. Ya there are not perfect... so! I really like the back ground and the simplicity of the black and white design. I think it is pretty eye catching.

With Sympathy

This card is by Gloria Ross. All the swappers commented on hey how did you do that? Gloria used Stamp'in Up! Stampin write markers and "scribbled" a bit of color using the brush tip. She then used black ink to stamp the flower and greeting. Great easy card that can be done in a multitude of colors and designs. Just remember when choosing the flower or focal image, make it a wide line or shadowed stamps sot hat it shows up well through the marker colors.  Thanks Gloria for the great card swap.
This little lovely is by Rozella Finch. Rozella just celebrated her 90th birthday at club and we had cake and sang to her. I have to say singing was really nice too! We all hopde that when we are 90 we can still be stamping too!