Washi Tape

 This fun card was made by Tracy Swift. I love the way she used washi tape as the stripes and then punched out star windows. Great use of the washi tape. This is a fun easy card to put together. You could change out the colors of washi tape to fit any holiday. Thanks Tracy for sharing and swapping.

Waaaa


Sorry blog friends, there will not be a Whip it Up Wednesday Video today as I am sick. I don't have much of a voice and am just not up to it. I have company coming this weekend and pray I am feeling better by then. I was hoping to be better today as my best friend is flying in early. I am on good (legal) drugs and drinking lots of hot tea. So a few more days and I should be back out it. Stay tuned for some great posts in the mean time. Love you all. 

Paradise

 When handsome and I went on an Eastern Caribbean Cruise this past month I took my art bag with me. I did these while we were in flight, or waiting, or just lounging around. It was the best form of relaxation for me, since I don't sit still very well. I seam to need to have my hands moving or holding a book. I did get a little reading in, but not as much as I did in my art journal. I carried with me my leather pencil holder and a little box plus my journal. It all fit in the back pack with the camera just perfectly. Best part handsome didn't mind carrying the bag! 


 St Thomas had the best view from our veranda. We were sea side and it is a beautiful harbor.

It is always good to be home, but leaving paradise is also hard.

Mmmm Biscuits


At Recipe Scrap Night this is the pages we did. I used the new heart stencil - oh love them. And some of the new double sided designer series paper. So cute. Love the way it turned out. Love the Biscuits recipes too. You can order them here! Just click on the links.

Hearts & Stars Decorative Masks by Stampin' Up! Hearts & Stars Decorative Masks

Price: $2.95

All Abloom Designer Series Paper Stack by Stampin' Up! All Abloom Designer Series Paper Stack

Price: $6.95

A Challenge

 I was given a challenge to create something with this black and white image. So I thought oh what a great little ditty to do using my new Twinkling H20's. So I transferred the image to Stamp'in Up's watercolor paper (it is fantastic paper), then painted it with the H20's, then outlined it using my micron markers. The black marker outline really makes the flower pop.
 My lovely collection of HT0"s. The camera doesn't catch the shimmer of this paint, but it is there and it is lovely.
 I layered it on a bit of basic black card stock, and then on pumpkin pie card. I stamped the "for you" and layered it over really red card stock circle punch.
 I wound up some ribbon and stuck it on behind the "for you" greeting using pot dots and glue dots.
I kinda cleaned out the excess H2O's on my brush on the envelope and then traced the image again using micron black marker over the dried paint. This was a very fun challenge to do. Hope you enjoy it too.

What to do with all of these flowers

 I showed you this card a few days ago that I had made for club, and I sent to my top in sales on my team. Well after stamping all the flowers and cutting out just one I had a hand full left over. And they were sitting on my desk, and sitting and sitting and I almost tossed them out. BUT then I thought to myself, self...... I just challenged all my club gals to make something with there left over vases of flowers and bring it to next club and I would have a little prize for them. I cant very well toss these out.

 So I had some time one afternoon (oh don't tell anyone, that I had some extra time on my hands) and decided to color all those flowers and pots using my retired set of Stamp'in Up!'s watercolor pencils. I have always loved those pencils and wish there were not retired last year. So once I had all of them colored, blended with a blender pen and cut out, they sat for a few days more. The colors are so beautiful. It made me happy just looking at the pretty colors laying in a pile!
 I finally came up with this easy little magnet tag. It isn't much, but I do love the way it all turned out.
 I used a few retired greetings that would fit on the tag, that fit the gift. I used So Saffron card stock as it is a neutral and goes with just about everything. The sayings are heart warming, and would lift anyone's day.
I tied on white ribbon to keep it simple, besides I really wanted the pots of flowers to be the focus and I believe that was achieved. These will be great to tuck in a card or leave as abandonment art, or to give as the little treat to those who really do make something with there left over flowers from club. May you be inspired to make a little something with your left overs.

Cinnamon Chocolate Swirl Banana Bread

A few of you know that the doctor put me on the Paleo diet because of all the tummy issues I have been having for a long time now. If you haven't heard of it, it is basically no dairy except for eggs, no grains, and no sugar. Ya Ya Ya I have heard it all.... oh so no food! hah aha!

It took some getting used to and some adjusting on how I cook. But basically I can have all the fresh veggies, and fruit, grass fed meats and nuts and seeds I want sort-of. So I have been doing pretty good about 90-95% of the time. It is hard to go out to dinner sometimes.

You know how I love to bake and share my baking. Well I came across an amazing bread recipe and after hunting high and low for the paleo ingredients to make it - it is really wonderful. You don't have to be on a diet or have any health issues to enjoy this. This bread is healthy and filling, and fills the need for chocolate .

The best part is that it satisfied my love of baking and using my Demarle pans. Not to mention my love of bread and cake and cookies and all the things I shouldn't have!  

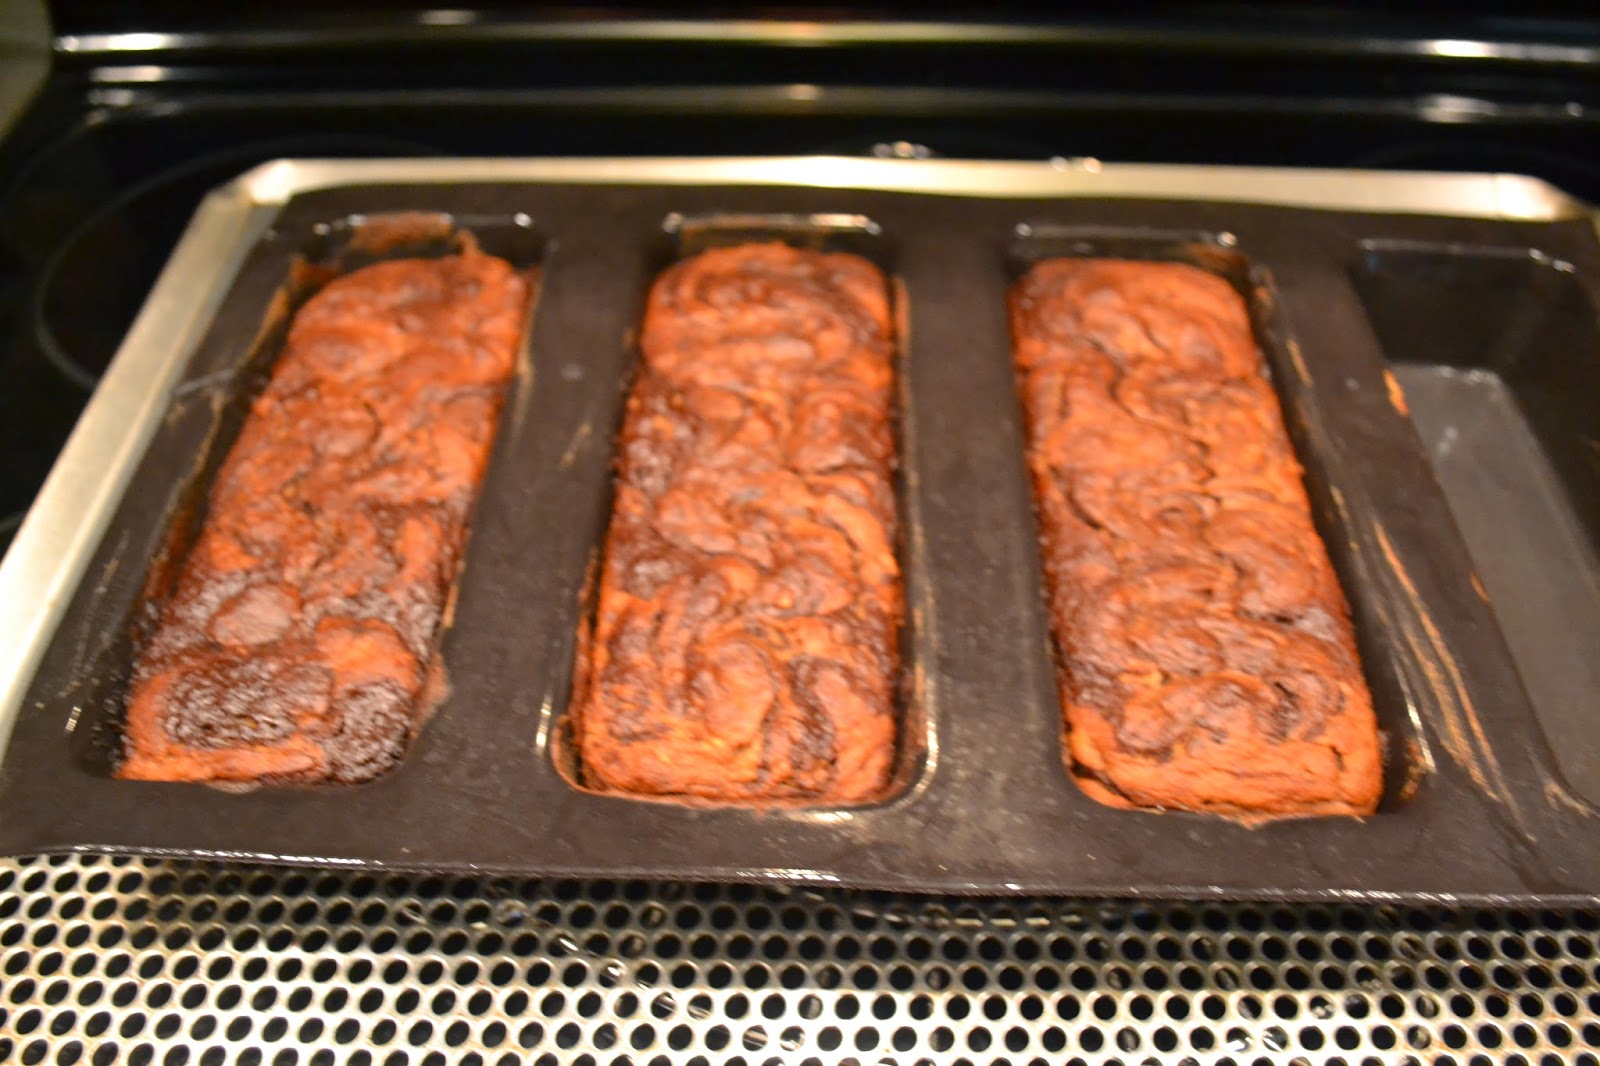
 Cooling in the Demarle Loaf Pan
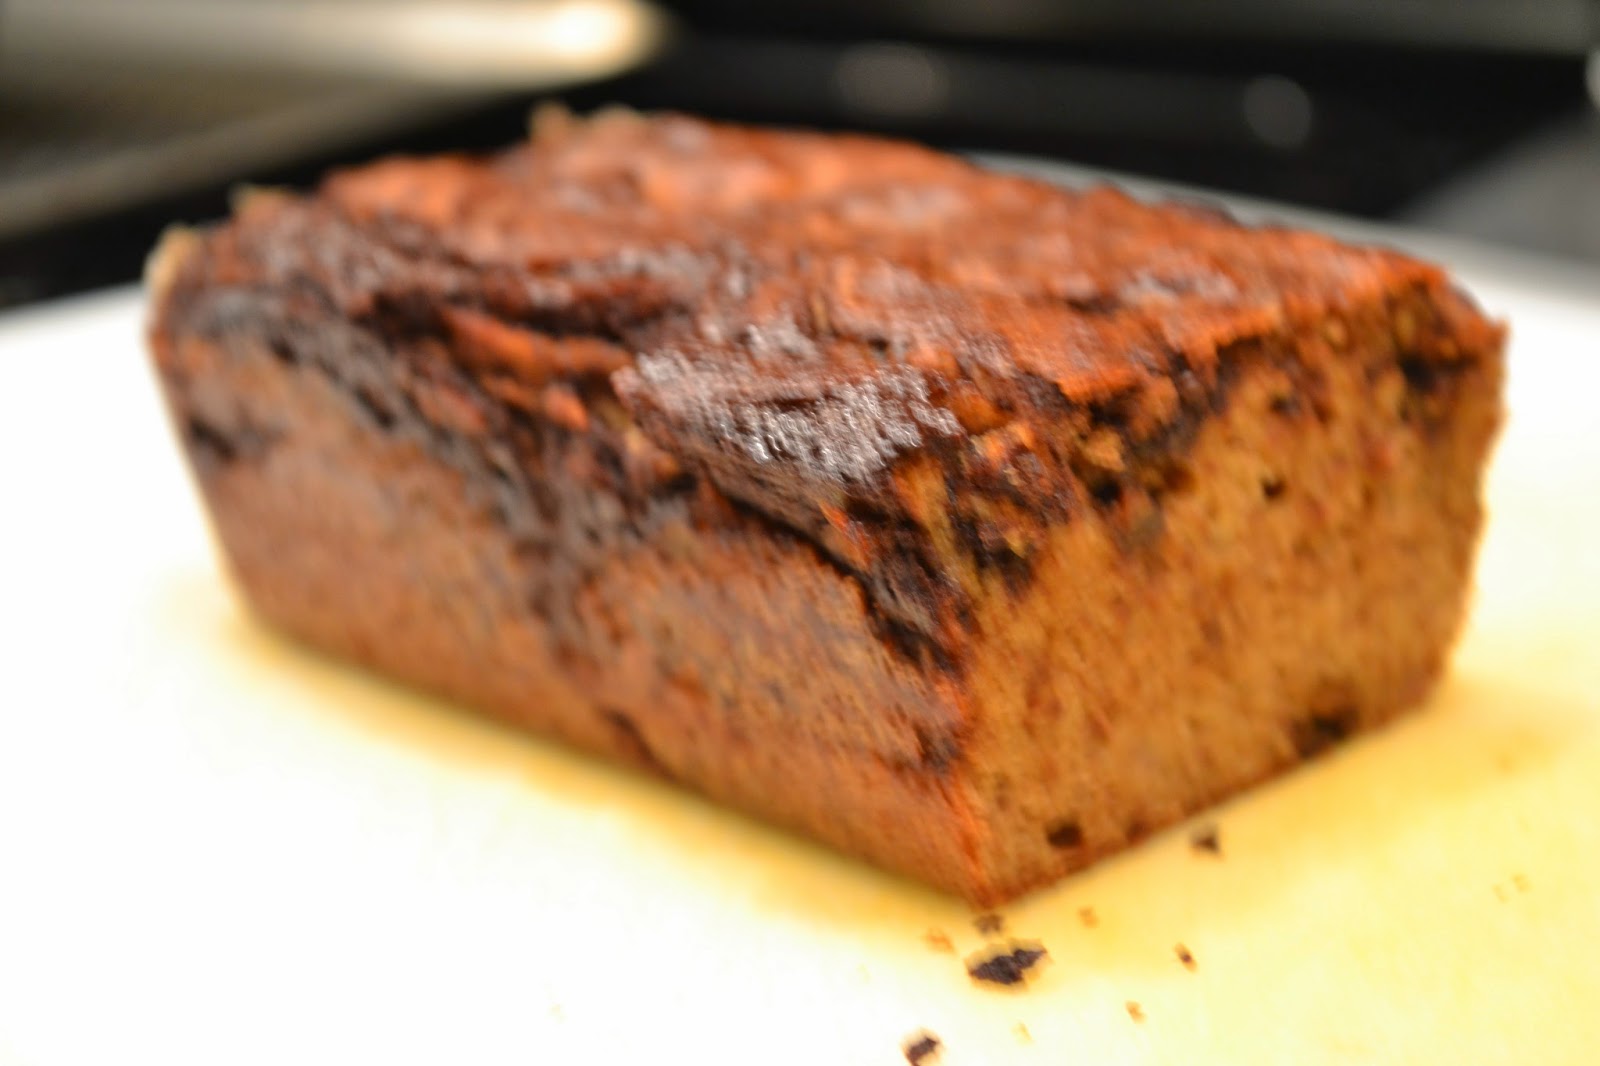
Cut into while warm and melted in your mouth yummy!

Okay so here is the recipe and a few tips that I did.

Coconut oil to grease the pan. Not needed if using demarle.

For the Bread:
4 med banana (about 1 pound)
4 large omega 3 eggs
1/4 c (1/2 stick) unsalted grass-fed butter, melted. I used a whole stick by mistake, and it turned out just fine.
1/2 cup Almond butter
1/2 cup Coconut flour (I found mine at Trader Joe's) I know this isn't much flour, but it really is all you need! I was surprised too the first time I made them.
1 tsp baking soda
1 tsp baking powder
1 tsp vanilla extract
Pinch of fine-grain sea salt (I used what I had on hand)
I also added more Cinnamon to the bread mix, maybe 2 tablespoons. I love cinnamon!

For the Swirl:
2 Tablespoons unsalted grass-fed butter
2 Tablespoons Ground Cinnamon
1/2 Cup Enjoy Life Mini Chocolate Chips (I couldn't find these, so I used a Trader Joe's dark chocolate bar and chopped up what I needed
1 Tablespoon Organic honey. We get our honey from a local bee keeper, so I know it is the really good stuff!

Oven at 350
If using a metal loaf  9x5" pan, grease the pan and line it with parchment paper.
If using Damarle use nothing - ya that is the awesome part about Demarle!

Combine the banana, eggs, butter and almond butter in a food processor or mixing bowl and mix until the ingredients are well blended. I used my food processor as I just broke the bananas up to fit in the processor. I think you may need to mash them before putting them in a mixing bowl.

Add the coconut flour, baking soda, baking power, vanilla and salt and continue to mix until all the ingredients are well combined. TIP: I am old school, so I mixed the dry ingredients first, then spooned mixed the wet into the dry.

In a double boiler over medium-low heat, mix together the swirl ingredients. Heat, stirring often, until the chocolate has melted.

Pour the bread batter into the prepared pan and spread it out evenly. As soon as you pour the batter, pour the chocolate swirl directly on top and use a knife to swirl the chocolate throughout the loaf pan.

Bake for 45 minutes, till toothpick comes out clean when inserted in the middle. If using Demarle pan I baked for 35 minutes and it was perfect.

Remove from the oven, and let cool in the pan on a cooling rack for 15 minutes before serving.

TIP: since I got 4 little loves, I cut two for the family to try and everyone loved it. I wrapped the other two loves in plastic and foil to freeze for later.

If you try this, let me know how it turned out. You can fine more recipes like this from the civilized caveman cooking.com. I do not get money for saying that, just wanted you to know where it came from. Enjoy.

Whip It Up Wednesday Video

It isn't midnight yet and yep it is still Wednesday. We have been going all day long and I just now sat down to do the video as promised. I thought I had one all ready to go, but noooo I deleted it by accident! Ah - its just the way life rolls sometimes. Any hootals -

This video came from a request of Nita Taylor wanting to learn how to make boxes she could put her hand made cards into. Since I was in the mode for box making I thought it was high time to show and tell.

You will need one sheet of 12"x12" double sided designer series paper and one 12"x12" solid color card stock to coordinate. Sticky Tape or Fast Fuse. Paper trimmer with cutting blade and scoring blade on it.

Box size 4 3/4" x 6" x 2" deep will fit medium size 4 1/4"x 5 1/2" cards.

Box bottom: Cut the solid card stock to 8 3/4" x 10". Score all four side at 2". Fold score line. Cut on score line to form tabs at each corner. Glue the tabs to the inside to form the box. Watch the video to see what I mean. It is easier to video it then it is to write it!

Box top: Cut the designer series paper 9" x 10 1/4". Score all four sides at 2". Fold Score lines. Cut on the score line to form tabs at each corner. Before gluing to form the corners, this would be the time to trim each side down by 1", so the box top will not be as deep as the box bottom. This will let you see the bottom color of the box on the sides. Watch the video to see what I mean here too!

Put the top of the box on the bottom of the box and admire your creative work, now fill it with hand made cards. You can use it as a gift, or just keep it for yourself to use.

Tip you can change the size of this box to anything you need. Just measure what you want to put in the box, add 1/4"-1/2" to all sides of your item, then add 1" to 2" for the sides for the box. Remember to add additional 1/8"-1/4" for the box top.

If you make the top of the box the same size as the bottom of the box it will not go on very well and bind up the bottom of the box when trying.

Hope you enjoyed the Whip It Up Wednesday Video. Remember if you have any problems, just leave me a comment or email me for any help. Have fun making lots of boxes.

Please share this with all your friends. I am really need your help in getting my web site out there and grow my stamping business on line. I would love if you could help me out. Thanks!


Stampin' Trimmer Stampin' Trimmer

Price: $29.95
  Stampin' Trimmer Rotary Addition 
  Stampin' Trimmer Rotary Addition
Price: $12.95
  Bone Folder 
  Bone Folder
Price: $6.95
 
  Fuse Fast Adhesive by Stampin' Up! 
  Fuse Fast Adhesive
Price: $9.95
Paper Snips Scissors
Price: $9.95
 
 
Buy 3 Designer Series Paper Packs Get 1 Free. Shop now!
Order your paper needs here

Life is Beautiful


 Just a little Art Abandonment Sharing. If you are interested in seeing what this is all about. Go to
www.facebook.com/groups/ArtAbandonment/FreeArt to read all about it. Any size, any type, any kind of art can be abandoned for a lucky someone to find. It is really fun.

You're a whole lot of wonderful

This stamp appeared in last years annual catalog and I fell in love with it. I love the greeting on it and the flower pots. It is just a single stamp, but I have shared it in club a few times now and the cards have all been different. The stampers have loved it too.

I stamped the image to the right of white card stock and using the paper trimmer, I cut the words off leaving a long ribbon of card stock. I colored in one pot with the blendabilities markers and then cut it out and pop-dotted it over the greeting "ribbon".

Cute right! I thought it was a pretty smart and simple way to use this single stamp. And besides who wouldn't want to be told that there are a whole lot of wonderful?!?

Just click on the purple highlighted underlined like to orders yours today. 

UNSET
Vivid Vases Wood Stamp Set 133818
Price: $11.95
Oh, the fun you'll have with this single wood mounted image. There are so many ways you can blend and color this image and you'll want to keep trying new combinations. Set Quantity: 1.

Last of the Red White and Blue

Susan Crabb made this beauty. I love everything about this card. Susan used my favorite retired tree stamp, flowers with pearls and the back ground paper is just perfect. It is to bad she isn't still a Stampin Up Demonstrator, as she is very creative and a sweet heart too.

  This is a totally awesome take on the Red White and Blue theme. So stinkin cute. Wish I could give credit to the artist.... no name :(.  Thank you to who made it, I do really love the idea and the theme interpretation.

Last of the M and M's

I save my favorite saying for the last. he who gives to me teaches me to give. I love this saying. It is so me too! The tree would make for funny hair on a rag doll too. Ha! Here we go.......

New Video


I am taking on a challenge! Oh Oh..... ya I know I may be biting of more then I can chew. So bear with me till I get this whole video posting thing down. I know its easy.. so I have been told. Easy for those who know how. I am still trying to remember all the steps and tricks and how tos.

So I am going to atempt to share a video every week. So stay tuned and look for: Whip It Up Wednesdays! Cute huh!

Ya, Ha, I thought it up all by myself while on my way home from dinner tonight. You know those creative brains that never shut down... well you would think I would be in comatose food over load after stuffing Chicken Fajitas in my pie hole! But noooooo - it was still on a creative role. Lucky yous!

Spotlight

Spotlight? What do you mean Spotlight. Well this card was done using the spotlight technique. I stamp the retired rose  on the card front and on a piece of white card stock. I then punched out an area of the white one and colored it in using the new blendablilites markers. Then I pop dotted it over the black stamp rose on the card front lining up the images so both layers would match. This makes a "spotlight." I then embossed "happy birthday". I love the way it came out and I really like coloring with the new blendability markers too. You can order a set for yourself below.

There are six new colors to choose from. Remember you will need the memonto ink pad as well. Click on the purple highlighted underline link to take you to the order page. Once you are there you can click around and shop for more colors and more Stampin Up products. Be sure to check out the clearance rack too. There are lots of new items added weekly. Plus the Weekly Deals as well. Happy shopping!


Stampin' Blendabilities™ Markers Old Olive Assortment
Stampin' Blendabilities™ Markers Old Olive Assortment 130999
Price: $11.95
Stampin' Blendabilities™ Markers Old Olive Assortment
Stampin' Blendabilities™ Markers Daffodil Delight Assortment
Stampin' Blendabilities™ Markers Daffodil Delight Assortment 130998
Price: $11.95
Stampin' Blendabilities™ Markers Daffodil Delight Assortment
Stampin' Blendabilities™ Markers Coastal Cabana Assortment
Stampin' Blendabilities™ Markers Coastal Cabana Assortment 131000
Price: $11.95
Stampin' Blendabilities™ Markers Coastal Cabana Assortment

M and M's


M and M = More Magnets. I love the zany checkered path, and the cute eyeless cat, and the basket is welcoming. Hope you are inspired.

Golly Bat Man

Oh be still my heart a man in uniform and a super hero at that. Blamm! Da na na nanna na na Bat Man! This is the stink'inest cutest card ever. Thank you Tracy Swift for making it and swapping it. I love it so much that I have already sent it to my youngest Grandson for his birthday.  Zowee!

The embossing folder that she used on the card base is new for this years catalog.... oh ya got to get 'ca self one. It is so perfect for guy cards.  Click on the purple highlighted and underlined link below to order yours today. Remember you will need the Big Shot to use this folder. Zonk!

Folder Arrows Textured Impressions Embossing Folder
Folder Arrows Textured Impressions Embossing Folder 132187
Price: $7.95
Transform your cardstock with a raised, textured design. 4-1/2" x 6-3/16".