Pack Your Crafting Bags Special

Dates: February 1 - April 30, 2013 Details:
During this limited-time offer, you can purchase the exclusive Sent with Love Stamp Set or Sent with Love Designer Series Paper-or bundle them for a special 20 percent discount!

#131847 Sent with Love Stamp Set (clear; English only) $17.95
#132182 Set with Love Designer Series Paper $9.95
#132851 Pretty Bundle (Stamp set, paper & Calypso Coral Twine) $25.50 (special bundle 20% off )


Owl Pillow

My sweet (oldest) granddaughter will be celebrating her 4th birthday day in April. And grandma (me) wanted to make her a little homemade gift with love. I saw the cutest owl pillow on the net somewhere, and scribble the idea down in my idea book thinking... someday I will make this. So the someday has come. I used some fabric from my oh so loved fabric stash, mostly fat quarters and a few scraps. I so love the way this has turned out. Even my dear honey said ... it was cute, even more so after stuffed. My 15 year old wants one now!

 So here is my process. Using a pencil, I sketched just half of the outside shape on my fantastic Stampin Up grid paper pad. Ya the top sheet was used...  it work great, and I wasted nothing. I used biscuit cutters for the eye circles. I was thinking if I did just half then the other half would match when I cut it out... it worked! So there is a little tip for ya, draw half and cut out, ahhhh it amatch!
 I laid my pattern on the fabric fold, and cut out the outside shape out.
 Then I used just the half of the pattern with the parts, and cut those out one at a time so I could keep track of it, and it made the job easy for my and my you know.... ol' brain. I cut the heart and beak on the fold. I cut the white part of the eye from white felt. As you may notice the beak in the finished project is a different color then originally planned, I like the brown beak as it blends in, then sticking out like. It think it made for a nicer more pleasing to the eye finish project.
 I then took some left over fabric and cut 1 1/2" strips and sewed them together, iron the seam open.  Isn't this fun fabric. My taste in fabrics and prints have changed so much over the years. I used to only love to use the little calico prints like you see in the yellow print above, now I am loving the splash of fun bright kinda contemporary prints mixed in.
 I cut out the owl wing from the striped fabric. REMEMBER you will need a right wing and a left wing, so once you cut out one with the pattern facing up, you will need to flip it and cut it out with the pattern facing down.
 I put iron-on fusible adhesive to all the parts, wings, beak, eyes and heart. I wanted to be sure the pieces stayed in place when I stitched around them. Then on my machine I quilted beside each of the seams on the quilted wings and then did the blanket stitch around all the pieces. 

You see in the shot above that they are all done and I have the right sides of the pillow together and have stitched around the pillow leaving an opening at the bottom side for turning and stuffing. Be sure to clip your curves and notch the tight spots, especially at the tips of the ears. Turn to the right side out, iron the seams and especially the little bit that needs to be turned in to ease sewing closed after stuffing. I used a whole bag of poly-fil stuffing. I wanted it a bit firm for the shape.
I did add a little bow to the ear. I thought buttons on the eyes would be cute, but I didn't' want any hard parts on it, in case my baby girl wanted to cuddle with it. I am so happy with the way it turned out. It was a nice way to spend an afternoon awaiting a icky storm that is going to bury us in some unwanted ice, sleet and snow. I don't feel to bad about it... there was 22 Robin's in our back yard this week, so spring is a coming! Yaha!
Happy Hoot!

Cluck Cluck

 Isn't this super cute? Super duper easy to make too. Just a few punches, glue and wa-la.... chick!
 Punch out one circle punch of any size you want really. I used my big one.... wouldn't it be nice if I knew the sizes my heart! ha this ol' brain won't contain that stuff anymore. So use your "big" one or what ever size you have.
 You will also need 4 little yellow heart punches. The little heart is in the great Stampin Up annual catalog, and you can click on the link at the left to get it. You will also need a Tangerine Tango (nope not just orange) Tangerine Tango... sounds delicious huh, scallop circle.
 Glue two hearts to the back side of the circle, one with the point sticking out for the tail, and one with the heart humps sticking out for the head thingy (thingy: stamping science terminology)  and layer two hearts to form the wing.
 See, this is the back side of the chick so you can see the tail and head thingy.
 Now cut the beak out of the delicious scalloped circle punch, just like the picture shows. A piece of pie shape.
Glue on the beak to make it look like the chick is clucking or singing.
Dot on the eyes using out fine tip of our stampin' writers. Super stink'in cute huh! Once you add this to a project you can add some legs, or let it sit in the grass or a nest or popping out of an Easter egg. Oh the ideas and the lack of time for all the fun. Hope you get to stamp today.  Since taking a picture of this recipe card scrappage, I added some little flowers in the grass.
Happy Stampin Chick!

NEW Paper Kits from Stampin Up!


It's a Magical Paper Escape Every Month!


I have been asked, "why is Stampin Up doing this when it should be "my job" to teach and show how?" 

Well not every demonstrators runs her business like me. There may not be clubs offered in areas others live. Some people want simple quick kits that don't involve owing every possible craft tool on the market. Some people want to be creative and don't know how or where to start. Maybe because this may reach those demonstrators can't or may never reach. These kits make really great gifts. 

It is an option, just another avenue that is being offered to promote and get in the public eyes of how great Stampin Up and the product are. I love the fact that you still need/want me to teach you. That just makes my day!  I also love the fact that Stampin Up is reaching those I cannot. 

Sharing the craft of stamping in any form is fun and a good thing! Just try one kit, get the free clear block,  you may end up loving it!


Sweep away the mundane-your creativity carriage awaits!
I'm Paper Pumpkin . . .
I come to your door each month (a fully decked-out creativity carriage). I'll help you to escape your life with some paper fun.
I come in a sweet box, but you'll really love what you find on the inside:
All the stamps, ink, paper, and accessories to create pinable projects. Create stuff like cards, journals, décor, and more!
Paper Pumpkin by Stampin' Up! is a new monthly kit program that anyone (even you) can enjoy!

Get Started
It's so easy to get started. Simply sign up for the program starting Monday, January 14 by visiting www.mypaperpumpkin.com and click Get it. Every month a new, surprise project kit arrives at your doorstep. Just think of the anticipation of creating a fun project to pin, showoff, and share with your friends and family-every month!
Of course, you'll want to know more. So here's the nitty gritty:
  • Each month we send you a unique, surprise kit with a project-cards, journals, décor, and more! (We've even color-coordinated, measured, and cut everything for you!)
  • Each kit includes stamps, ink, paper, and accessories-everything but adhesive.
  • Each kit gives you a 30-minute creativity escape.
  • We will ship your Paper Pumpkin on or around the 15th of the month.  
  • You need to sign up for a kit by the 10th of the month to get that month's kit. If you sign up on the 11th of the month, your first kit will come the next month. (Let's say you sign up on May 10th, we'll send your kit around May 15th. If you sign up on May 11th, we'll send your first kit around June 15th.)
  • A Paper Pumpkin membership is $19.95 per month (and shipping is included!)
  • There's no commitment, you can cancel your monthly Paper Pumpkin at anytime. You can also skip a month if you want.
  • Starting in early March, we'll offer a Try-It kit if you'd like to try Paper Pumpkin for one month.

Here's How You Order
Sign up for your monthly Paper Pumpkin starting Monday, January 14 by visiting www.mypaperpumpkin.com and click Get it. Be sure to choose me as your demonstrator.
Starting in early March, you can try Paper Pumpkin for one month by visiting our online store.

A Free Gift in Your Very First Kit
The Welcome Kit is the very first Paper Pumpkin you will receive in your first month of membership. The Welcome Kit includes a free gift-a clear acrylic block!

Club Members Treat

 Are you a club member? You don't want to miss the month of March, because all my club members will be receiving this really great gift from me. Oh you want to know what is inside... well ya gotta come to club. Be sure to check out my calendar of events page, and RSVP ASAP so you don't miss out on this really great treat.
If you live in the USA and do not live close enough to come to club you can get club in the mail. For $12.50 you will receive 5 greeting cards with envelops with all the supplies to finish. Basically you cut, glue and pop dot the elements in place. I do the prep work, you do the finish work. It is a great steal deal! Sign up, get the first kit, try it, love it, keep getting the kit in the mail monthly till you say stop! Contact me to get your card kit for March.
Happy March Gift Giving!

Apple Cake

 I have been experimenting with my new bake ware from Demarle. And here is my honey's most favorite cake ever. We call it Apple Cake for short but the real name is William Tell's Never Miss Apple Cake. Silly name huh?!? However this cake has "never missed" pleasing anyone. It is moist with chunks of apples and slivers of carrots that makes you think you are eating good! Then it is topped with an amazing carmel praline drizzle that just makes you go "ahhhh", "ohhh", "Oh my goodness sakes" "hummmm", "yummm".... well that is what my 15 year old did when she took her first bite. Made me think of that scene in the movie "When Harry met Sally".. when they are sitting in the cafe and she.... well you get the picture. Funny huh! You know it is good when a cake will make you do that! ha!

Here is a shot of the perfect un-molded cake right out of my Demarle bakeware pan. Love my new pans! No grease, no flour, less calories, like it matters with this recipe!

 I almost didn't get a picture of it cut so you could see the cream cheese layer. We had 1/2 eaten the night I cut into it. But not just the 4 of us ate it.... I shared with our dinner guests, and I took a big ol' chunk to my mom and pop in-laws. I know, your tongue is hanging out and you really want the recipe now right! Well, the nice lady that I am is happy to share it with you. I would love to hear your comments on how good yours turns out.

William Tells Never Miss Apple Cake.
1 package (8oz) Philadelphia Cream Cheese softened
2 c. sugar divided
4 eggs
1 c. Canola Oil
1 c. all purpose flour
2 teas. baking powder
1 teas. cinnamon
1 tea. salt
1/4 tea. baking soda
2 c. chopped peeled tart apples
1 c. shredded carrots
1/2 c. chopped pecans
Praline icing:
1/2 c. packed brown sugar
1/2 c. butter, cubed
2 T. 2% milk
1/2 c.  powdered sugar
1/2 teas. vanilla
1/2 c. chopped pecans, toasted
In a small bowl, beat cream cheese and 1/2 c. of the sugar until smooth. Beat in 1 egg; set aside. In a large bowl, beat oil with remaining sugar and eggs until well blended. Combine the flour, baking powder, cinnamon, salt and baking soda; gradually beat into oil mixture until blended. Stir in the apples, carrots and pecans.
Transfer half of the apple batter to a greased and floured 10" greased fluted tube pan; layer with cream cheese mixture and remaining apple batter.
Bake at 350 degrees for 50-60 minutes or until a toothpick inserted near the center comes out clean. Cool for 10 minutes before removing from pan to a wire rack to cool completely.
In a large saucepan, bring the brown sugar, butter and milk to a boil. Cook and stir for 1 minute. Remove from the heat; whisk in powdered sugar and vanilla until smooth. Drizzle over cake. Sprinkle with pecans.

Notes for using your Demarle bundt pan: Bake at 340 degrees. Mine took the full 50 minutes till done. Use NO grease or flour in the pan! Oh ya baby! Let it cool a little longer so it will un-mold easier.
Mmmmm Cake!

Winter visitor

We had a little visitor. Dad and I have been putting out bread crumbs and seeds for a few weeks. I could sit and watch them all day if I didn't have stamping, sewing, cooking, and baking to do! Wow, God makes the best stuff - so beautiful!
Happy Blessings!

Slider for Gum


Super cute and easy treat holder. I purchased Trident gum in that comes in the bubble packages and made them into a slider package. You will need a 3"x 8 1/2" piece of card stock. Fold that in half and put sticky strip tape on both long sides. Once this is folded in half it becomes a little pocket. Then punch a hole where the ribbon will go in at the open end of the pocket. You will need a good amount of ribbon that will go all the way around the gum package and stick out a bit to tie in a knot. Thread the ribbon in the hold, then push the gum package so the ribbon will feed into the pocket too. Once you have the gum package in place, tie the ribbon ends in a knot. When you pull the ribbon out, the gum will come out with it. Decorate as you please. I love this new stamp set from Stampin Up!. You can get all the supplies at www.debbiebuchanan.stampinup.net.
This was my inspiration I received in a swap years ago. Super cuteness!
Happy Treat Giving!

You are Loved

I made these little candy treats for all my stamp club friends. Candace was great to help fill the 1"x8" cello bags with M&M's and hearts. I punched out a bunch of heart from designer series paper and sparkly red paper. Pop dotted the hearts to the topof the cello bag.
  Happy Valentine's Day!

That's Amore

 I love Valentine's Day. I know it's been called a Hallmark holiday to make money for retail. Bla, bla, bla.  But I still love it. I thought you might like a little inspiration for a love scrapbook page.
I used basic black card stock for the 12"x12" base. I most always make a double spread layout. As I like the pages when open side by side to kinda match or compliment each other. I think that helps to make the photo pop off the page. The red scalloped heart doily is from the More Amore Designer Series Paper too. I just cut a one of the hearts of the die cut paper that comes in the package. ... Oh I know, be...u...ti..ful!
I used Stampin Up new More Amore Specialty Designer Series Paper #129307 $12.95. I die cut out the hearts and letters. Added buttons, rhinestones and ribbons. All from Stampin up.
The letters are embossed, (sorry hard to see). The little red hearts are punched out of the Red Glitter paper. We have silver too! Love this stuff. A girl can never have enough sparkle!
Even this super cute little paper doily came from Stampin Up! This page will be shared at Scrap Club. You can make if for just $10 on Thur Feb 21 at 6pm. Contact me here to RSVP if you plan to come.Visit my web site at www.debbiebuchanan.stampinup.net to get all your stamping supplies.
LOVE SCRAP BOOKING!

Valentine's Day Center Peice

A welcome sight as you enter my kitchen. This sits on my counter. I just love it. And they came from me to me. I needed a pick me up last week, and this $4.88 splurge did cheer me and everyone else who entered.
Happy Valentine Cheer to You too!

Yellow Swallowtail

This new Swallowtail stamp has been a huge hit! Everyone who sees it loves it. My mom would have had to have had it. She loved butterfly's, and this one reminds me of her.

I used white card stock, and embossed the image in white embossing power. Then I rubbed or burnished (burnish: tap sponge or dauber in ink, and apply ink to card stock in a continued rubbing motion, without lifting sponge or dauber from card stock.... like you are giving it a back rub) daffodil ink in the center, then more mustard ink, then pumpkin ink on the other edges. Layerd the card on daffodil card stock and tied on the ribbon. I then used the 2-way glue and outlined a bit of the lines and sprinkled on dazzling diamonds glitter.

I made about 30 of these. My arm was killing me after all that burnishing! Funny story about the word burnish. I was teaching this techique in club, and was explaning to the new stampers to burnish, not tap the ink on on card stock. Dear Becky was so confused, and didn't know why I was telling her to "burn the sh_ _??" Ya you fill in the blank... don't think I should say a bad work on public blog! Everyone got a good belly roll our of that one! I still laugh at it every time I use that word.

This card was used for my stamp teams top 10 in sales surprise in the mail. It was also used for my club swaps. Love it? Leave a comment. I like comments, ideas, and suggestions. Keep this blog on line by supporting me by ordering your Stampin Up Products from me at my web site.

Happy Burnishing!

Turkey Pot Pie

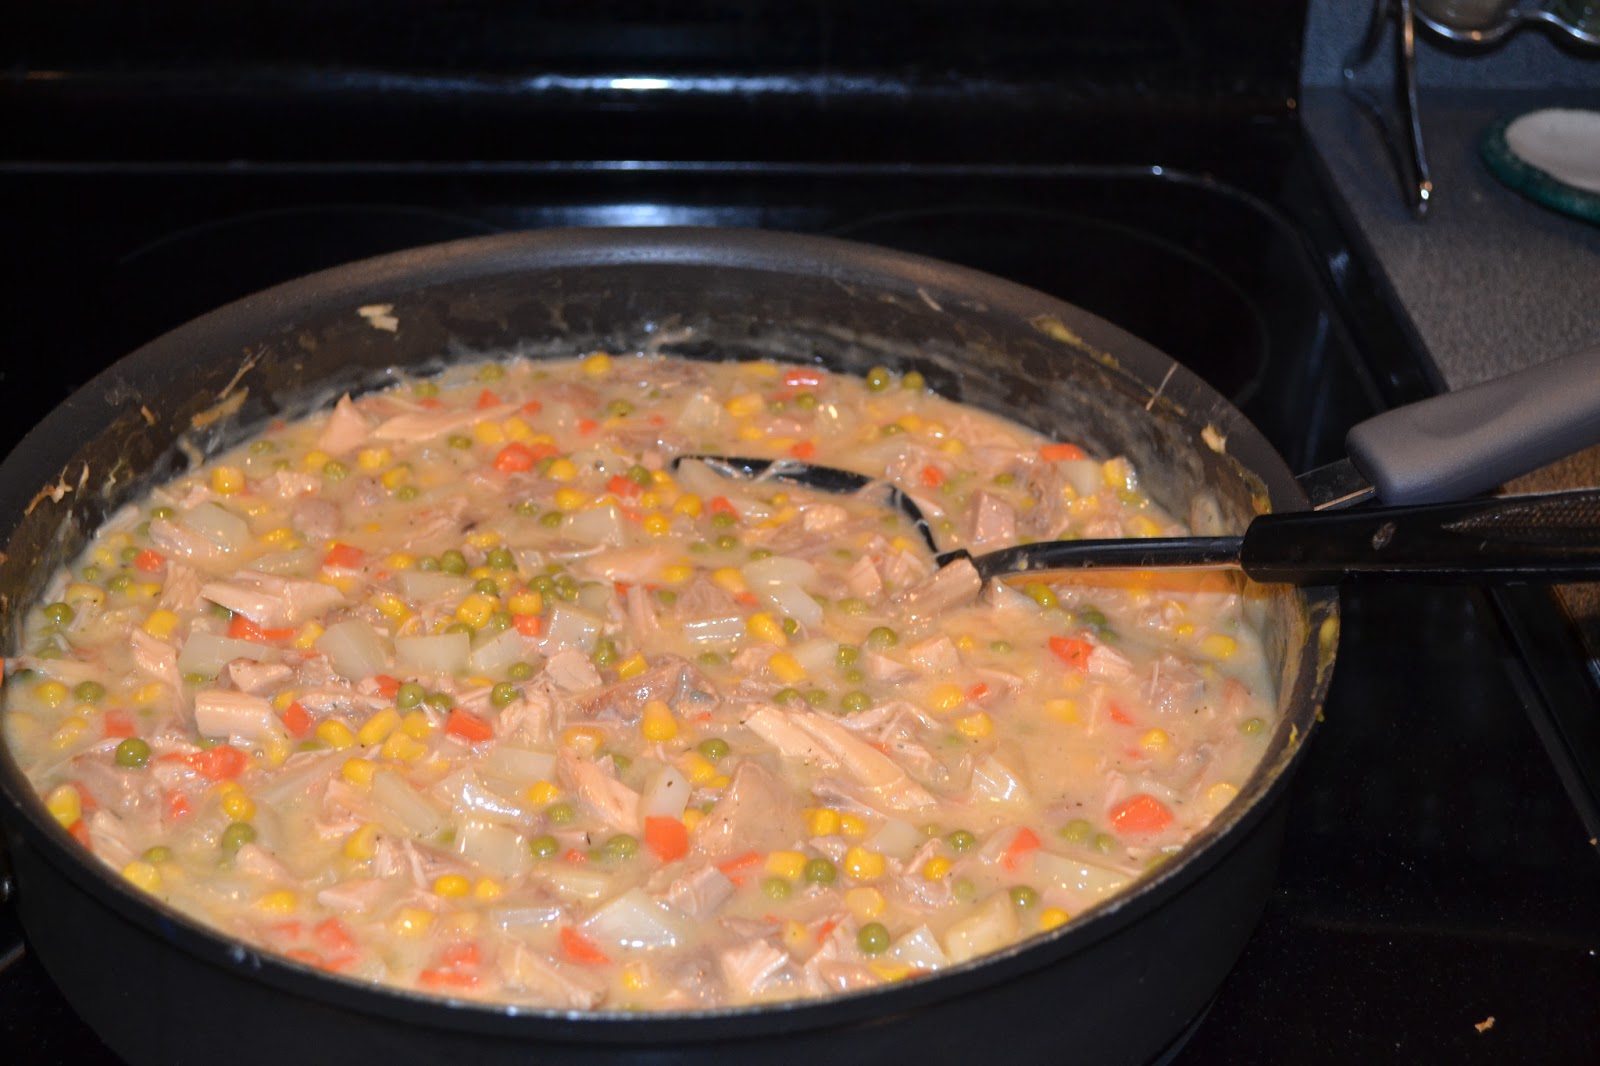
I thought I would share a yummy dinner with you today. I had left over turkey from Thanksgiving in the freezer. So thought it was time to use it up. So I put that in a large fry pan, added cream of chicken soup, 2 chicken bullion cubes, a can of drained corn, a can of drained peas, some chopped up carrots, green onions and added some milk and seasonings. Let that come to a simmer.
I had a cooking party for Demarle at Home a few weeks back and wanted to see how my turkey pot pie would come out in the large round mold. I had made two cheesecakes in for my daughters wedding, and my, oh my, were they ever perfect! So getting back to the pot pie.....

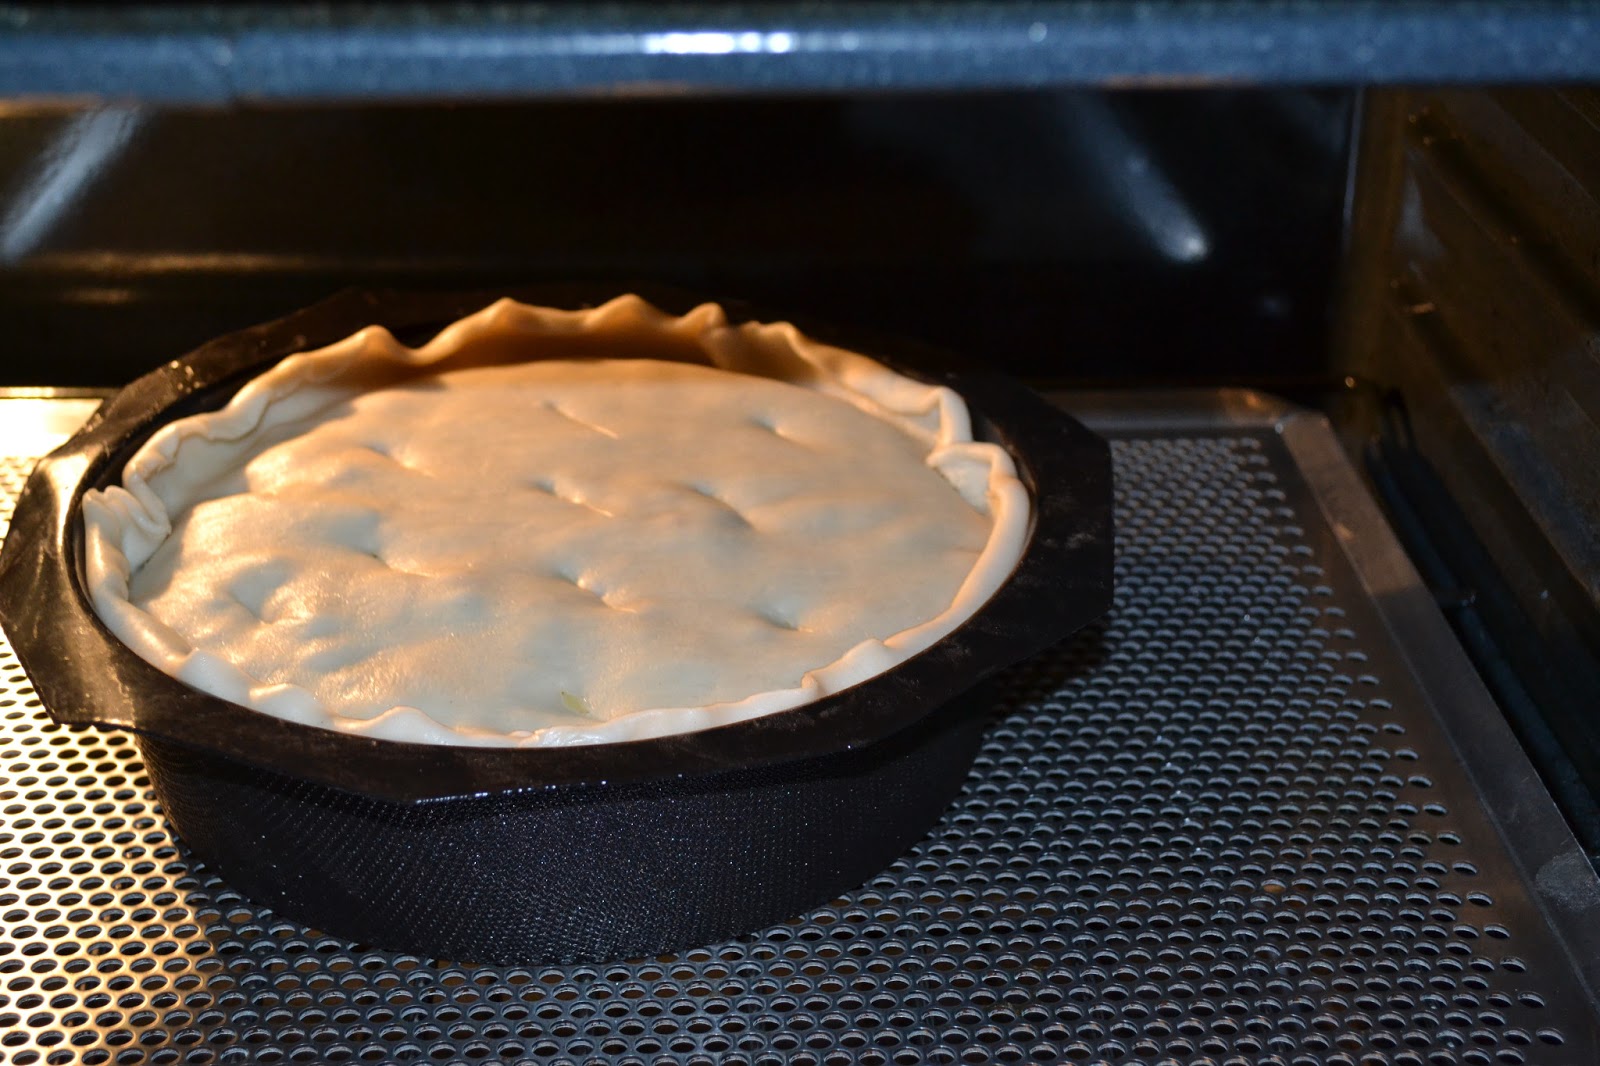
I used two refrigerator pie crusts. The first one on the bottom. You don't need to spray or grease anything. Just lay the pie crust in the bottom of the mold and slightly press the crust up the sides.  I spooned in the filling, and it came up over the edge of the crust. I wasn't worried about it looking beautiful, but just wanted to get all the filling in there. 
 
Then I topped it with the second crust. Curled the excess crust edges in, and added some slits on top. Put it on the recommended baking sheets. In to the oven at 375 degrees for about 25-35 minutes. Since the filling was hot, I just needed to bake the crusts. I could have done an egg wash, but was in a hurry as we were all hungry, and I kinda forgot about it, till after I took it out of the oven.
 
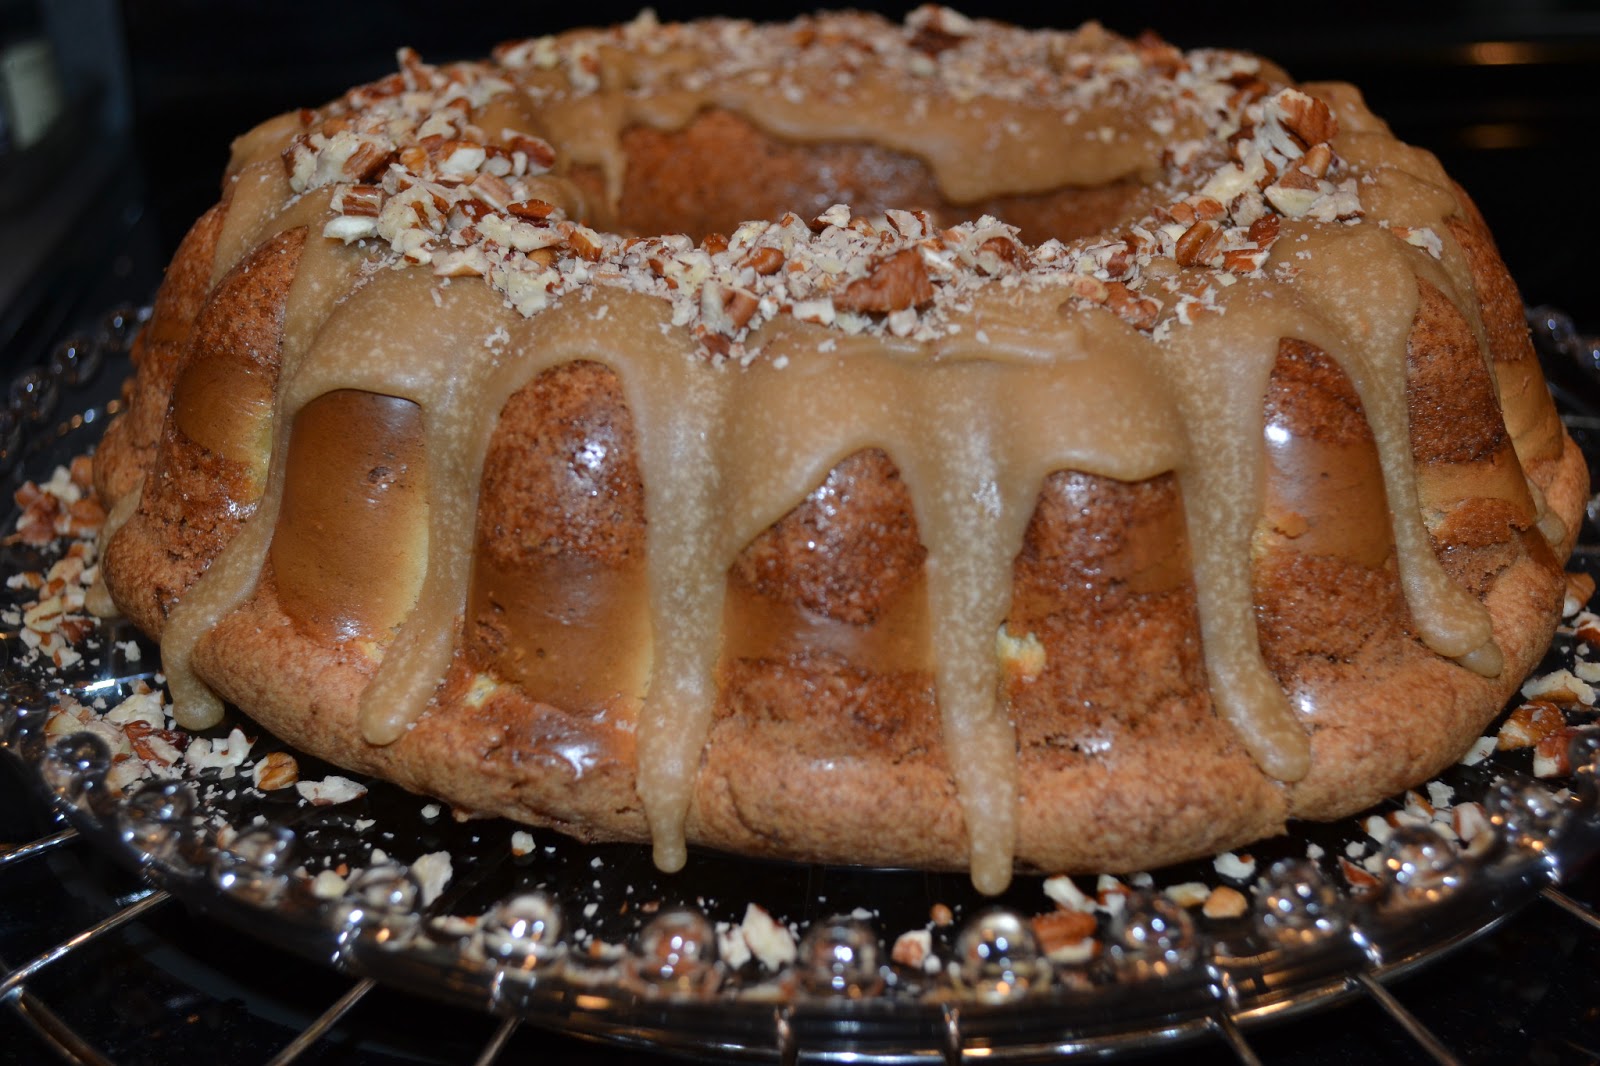
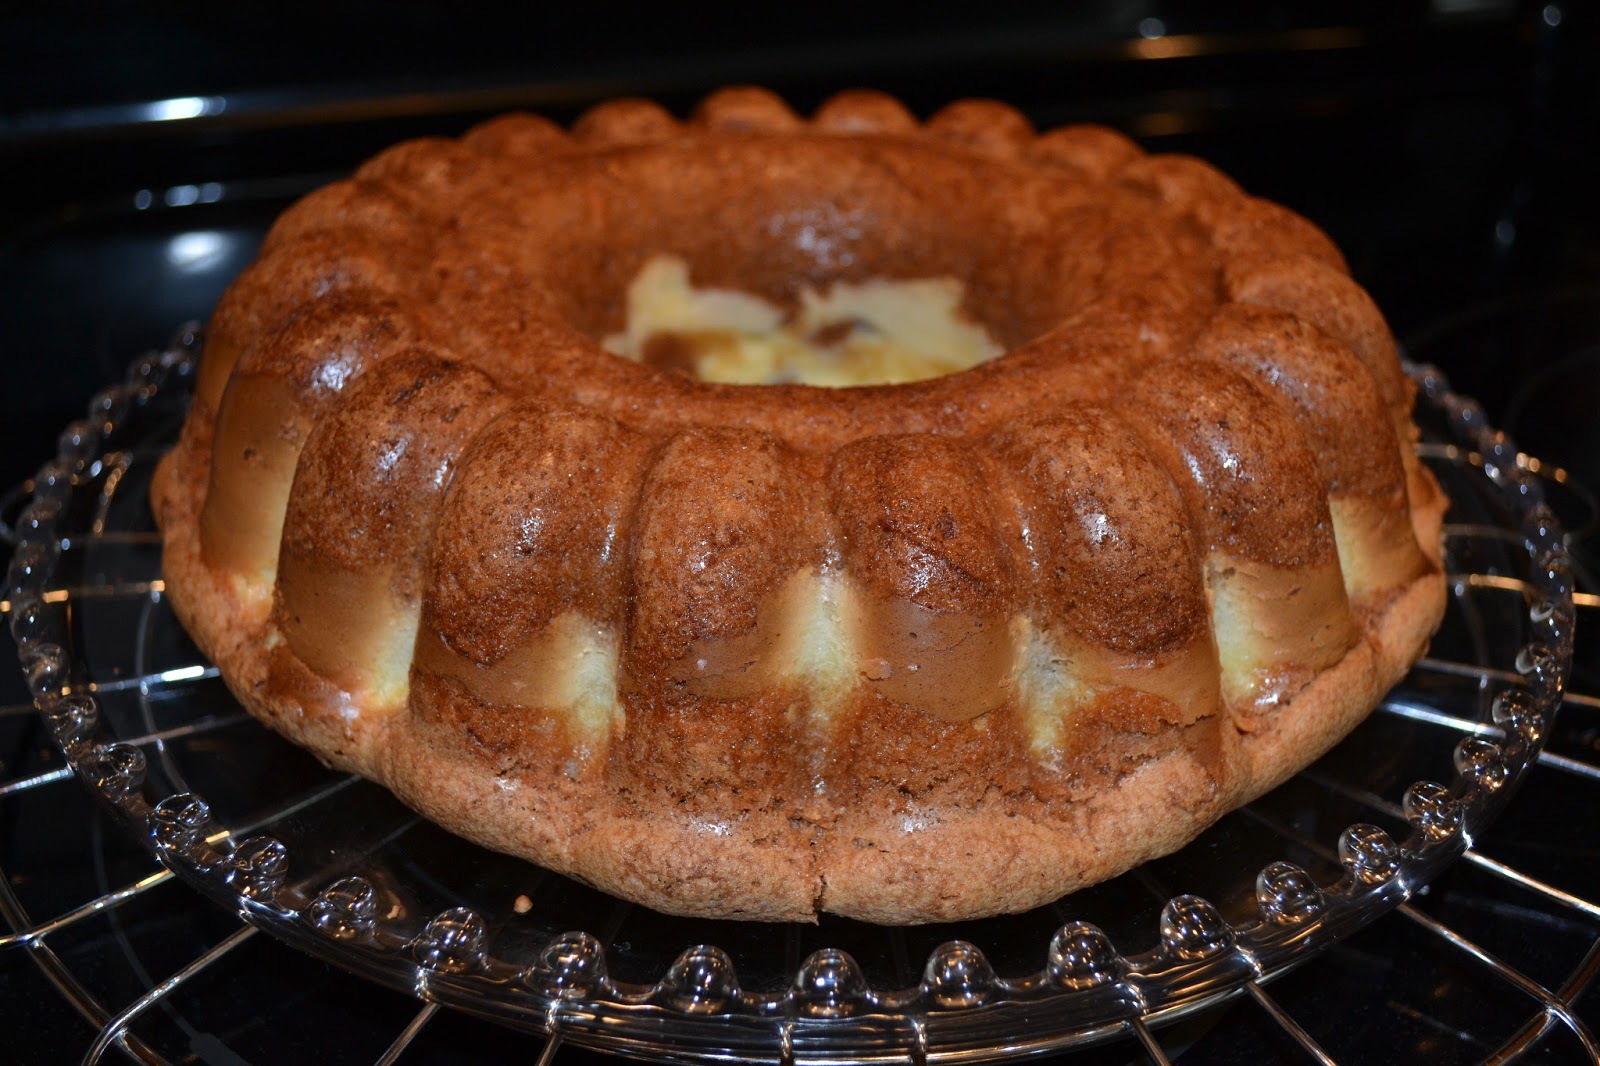
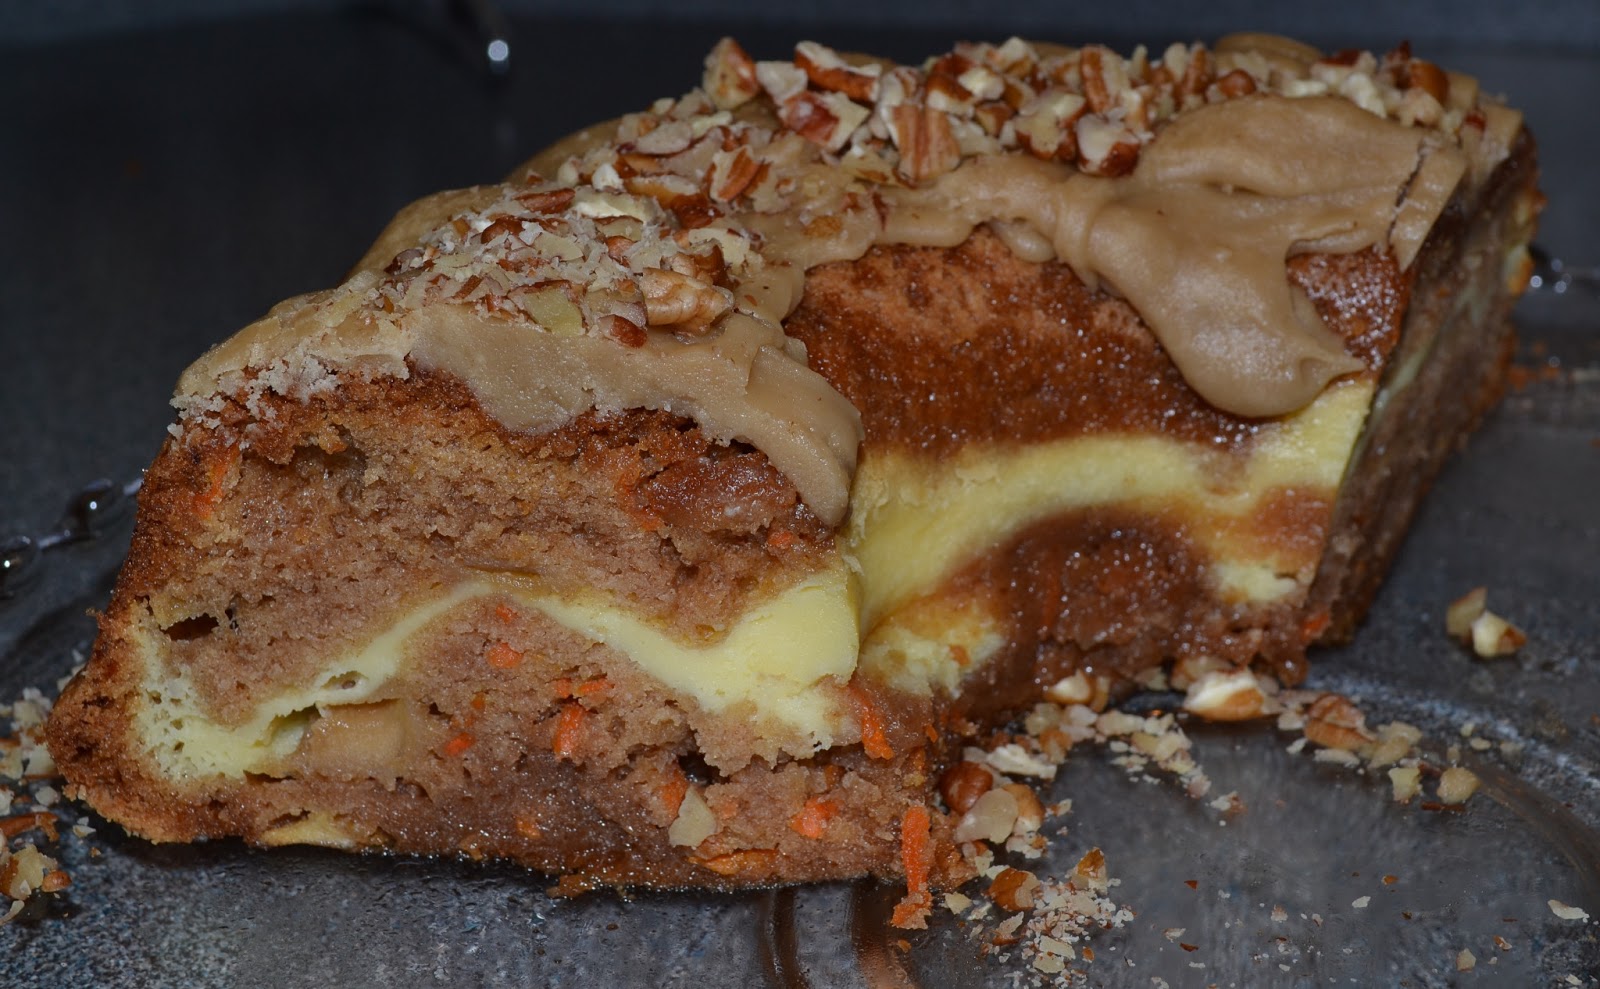
Here is the finished yummy dinner with a spoonful missing.  It baked up wonderfully in the flex mold. I was super pleased with the results.
Dinner is served! Candace (our soon to be 15 yr old) said it was the best Pot Pie she had ever tasted, and that I could sale it and be rich! Ahhh, sweet kid huh! The clean up was a snap, hot sudsy water with a soft dish cloth, wash it, rinse it, and shake (yep shake) it dry. Using some cloths can leave fuzzy's on it, and you don't want fuzzy's! Roll it up and store in cabinet.

If you are interested in learning more about this cookware contact my Rep Bonnie here. She is so great and the product is pretty fantastic too. I do not sale this, nor have I been paid by the company or my Rep. to write about it. I love this product and wanted to share it with you, my friends. I am was pretty set in my baking and cooking techniques. This cookware has totally changed my mind. I hope you get a chance to try it too!
Happy Cooking and Baking!

Jan ATC Swap


I wanted to share a few winter ATC swaps that were traded. Join us for the Feb swap. Theme: Valentine's of course! Make 4 ATC swaps (card size: 2 1/2"x 3 1/2" )and get 4 different ones back. Be sure to have them to me by the end of Feb. Contact me if signing up to swap.
Happy Valentine's Swapping!

Paper Cake

On a diet? This birthday cake will not add calories to your special day! This is super simple, and can be done using any background papers. We did one in club a few years back that was for a wedding. The card was vanilla on vanilla, and the cake layers were embossed.  I wanted to share this design with you, because it is simple, quick and super duper cute.

The cake layer size is 1 1/2" x 1 1/2", 1 1/2' x 2 1/2", and 1 1/2" x 3 1/2".
Emboss your card base using any embossing folder. Cut out the cake layers, glue them on. Using Stampin Up's, cup cake punch, punch out and glue the candles and flames on. (using tweezers helps) Add the greeting.

Have you enjoyed the last few cards that have been shared. Join me for card club and you can make great cards like this every month. Oh you live to far away? Well I can send card club through the mail for just $12.50. (USA only) Just contact me here.
Card Club is Fun!